Search
Latest topics
» Happy Birthday!!by sanderson Today at 6:36 pm
» How best to keep a fallow SFG bed
by sanderson Today at 6:25 pm
» Thai Basil
by markqz Yesterday at 1:40 pm
» Preserving A Bumper Tomato Harvest with Freezing vs Canning
by plantoid Yesterday at 11:36 am
» New SFG gardener in Auckland
by sanderson Yesterday at 12:14 am
» Mark's first SFG
by sanderson 11/6/2024, 11:51 pm
» Need Garden Layout Feedback
by sanderson 11/5/2024, 2:33 pm
» What Have You Picked From Your Garden Today
by OhioGardener 11/5/2024, 2:29 pm
» Greetings from Southeastern Wisconsin
by sanderson 11/5/2024, 2:01 pm
» N & C Midwest: Nov. Dec. 2024
by Scorpio Rising 11/3/2024, 3:51 pm
» Spinning Compost Bin-need some ideas
by rtfm 11/2/2024, 7:49 pm
» Kiwi's SFG Adventure
by KiwiSFGnewbie 10/31/2024, 9:55 pm
» Growing fruit trees in Auckland
by OhioGardener 10/31/2024, 4:23 pm
» Vermiculite -- shipping sale through 10/31/2024
by markqz 10/30/2024, 2:27 pm
» N & C Midwest: October 2024
by Scorpio Rising 10/30/2024, 10:38 am
» What are you eating from your garden today?
by Scorpio Rising 10/27/2024, 10:27 pm
» Old Mulch and Closing Beds for Winter
by sanderson 10/26/2024, 11:00 pm
» Ohio Gardener's Greenhouse
by OhioGardener 10/25/2024, 7:17 pm
» Hello from Land of Umpqua, Oregon Zone 8b
by sanderson 10/25/2024, 3:14 pm
» Hello everyone!
by SFGHQSTAFF 10/24/2024, 3:22 pm
» Senior Gardeners
by sanderson 10/23/2024, 6:09 pm
» Hello from South Florida
by markqz 10/23/2024, 10:30 am
» Confirm what this is
by sanderson 10/11/2024, 2:51 pm
» Harlequin Beetles?
by sanderson 10/7/2024, 3:08 pm
» N & C Midwest: September 2024
by OhioGardener 9/30/2024, 4:13 pm
» The SFG Journey-Biowash
by OhioGardener 9/29/2024, 8:33 am
» Fall is For Garlic Planting
by Scorpio Rising 9/28/2024, 12:19 am
» source for chemical-free lanscape fabric
by Woodsong 9/19/2024, 10:51 am
» Hurricane
by sanderson 9/14/2024, 5:42 pm
» Pest Damage
by WBIowa 9/8/2024, 2:48 pm
Google
Adventures in Table Top
+17
Scorpio Rising
AtlantaMarie
audrey.jeanne.roberts
ps1914
kristinz
littlesapphire
walshevak
boffer
llama momma
yolos
has55
jimmy cee
Marc Iverson
tabletopper
sanderson
Kelejan
ralitaco
21 posters
Page 6 of 9
Page 6 of 9 •  1, 2, 3, 4, 5, 6, 7, 8, 9
 Re: Adventures in Table Top
I'm not aware of a database.
Generally, spacing in squares can be determined by using the recommended spacing on seed packages for maturing plants (sometimes called the 'thin-to' spacing).
(12÷seed spacing)2=number per square
Example: The instructions say to thin carrot seedlings to 3 inches.
(12/3)2=per square
(4)2=per square
16=per square
That's a good starting place. After gaining some experience, folks may adjust up or down based on their results.
In my climate, rosemary is a perennial, and bigger than a determinate tomato plant. We have ours planted in an ornamental garden.
I can't help with the other herbs; my wife grows those in her ornamental beds.
 Re: Adventures in Table Top
This is just my experience, probably not typical! 
Thyme is so little so 4/sq (perennial in my area)
Basil can get big so 1 or 2/sq
Rosemary -ditto on what Boffer said. I have mine in a large pot as a perenial
Sage - pineapple sage 1/sq (I have mine in a large pot)
Regular sage - 1 or 2/sq
Dill - it can fan out at the top so again, mine are in pots.
Cilantro - I push the envelope and grow several seeds in one bunch. 1/sq
Coriander Cilantro- 3 or 4 seeds in one bunch and it really spread out and took over the back 40. The bees and wanna-bees loved the early flowers. This variety of cilantro bolts early and mine grew to over 2 ft high. Thank goodness I planted it in a spare 12" x 6" area at the edge of the box.
 Re: Adventures in Table Top
Just to recap: The MM from the ground beds was made over 5 years ago. I planted it one time but got discouraged and busy and it just sat there after that. I had let it go and the grass and weeds and acorns took up residency there.
It is my understanding that the Vermiculite and Peat Moss would last a very long time and just the compost would have to be replenished. So I had to screen the MM to remove the roots, acorns, etc.
So now that I was able to get the beds done, I was able to finish screening the old MM from the ground beds.
After 1/2" screen: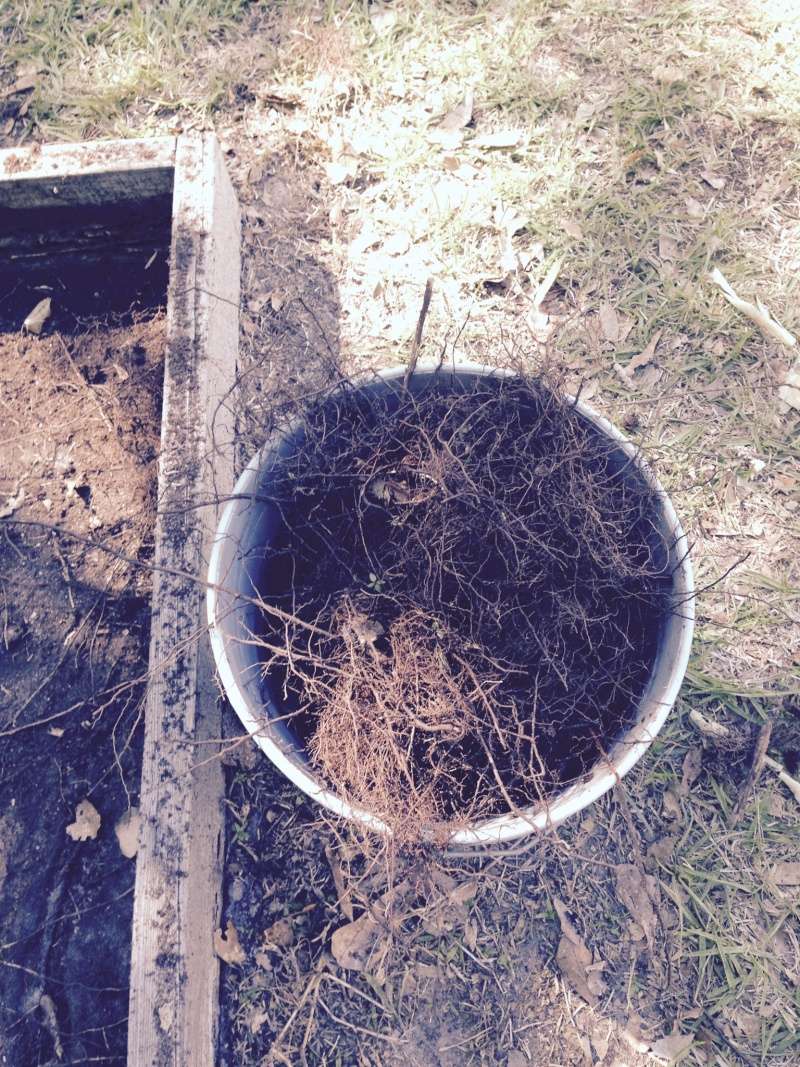
After 1/4" screen: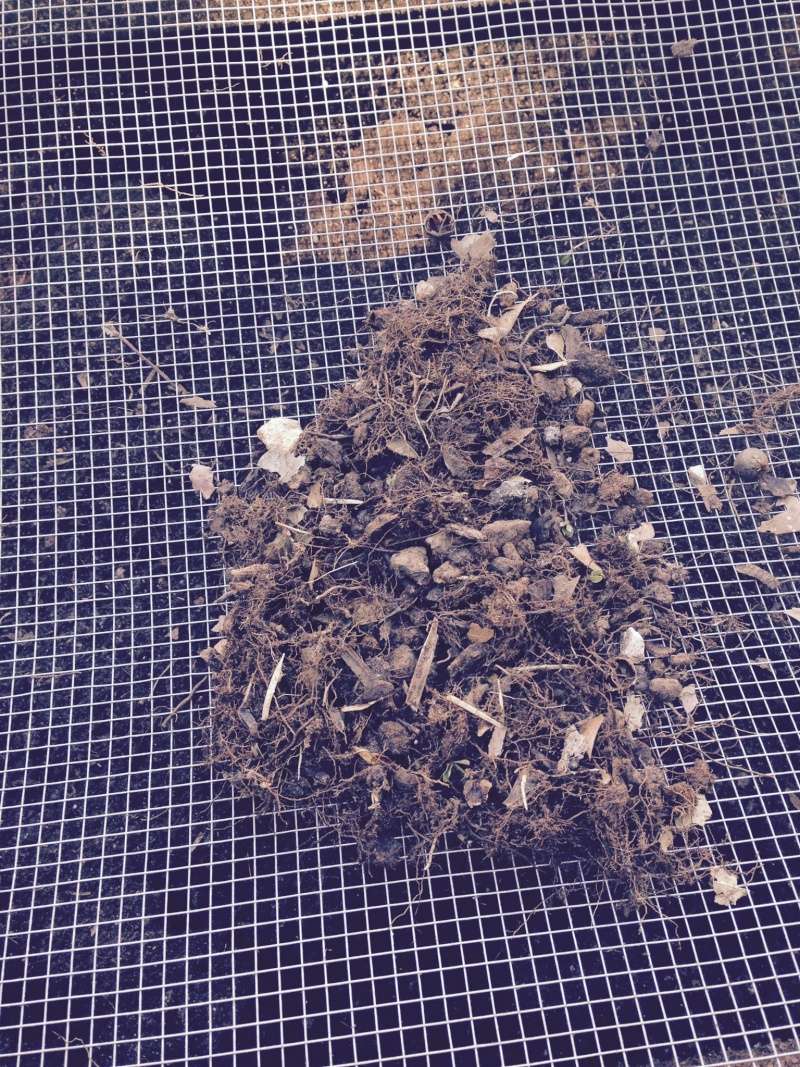
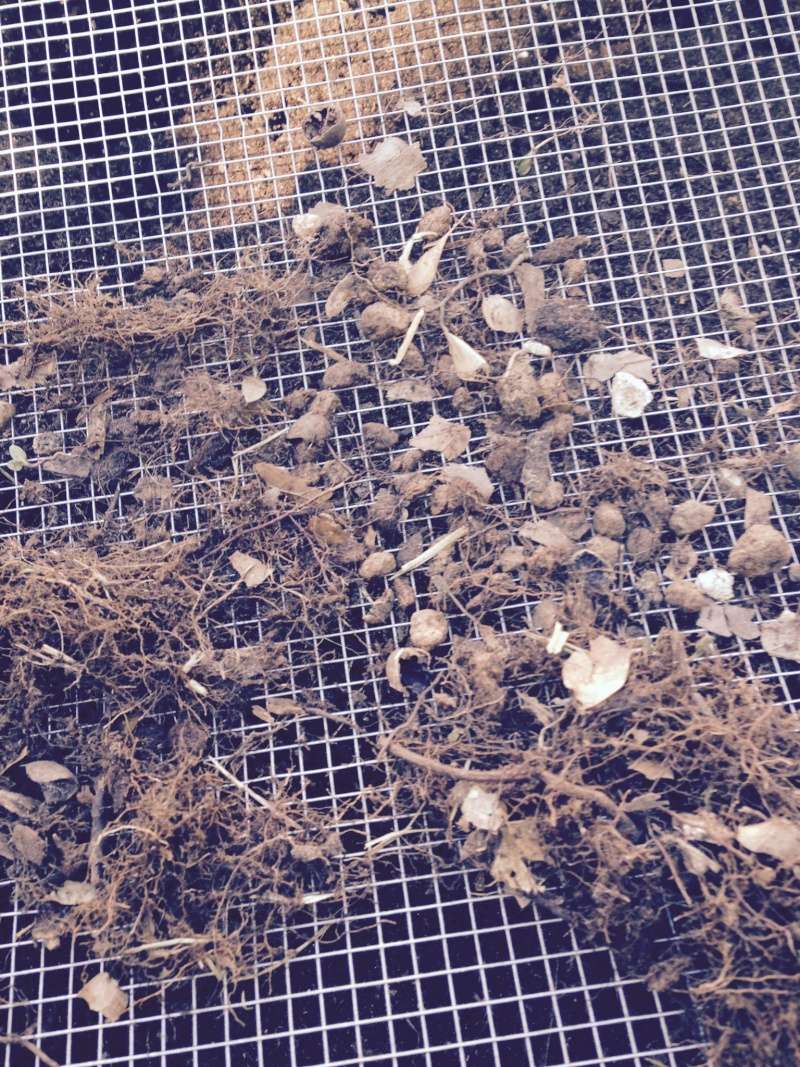
My 1/4" screen setup:
Screened soil in the 2x8 - woohoo!!!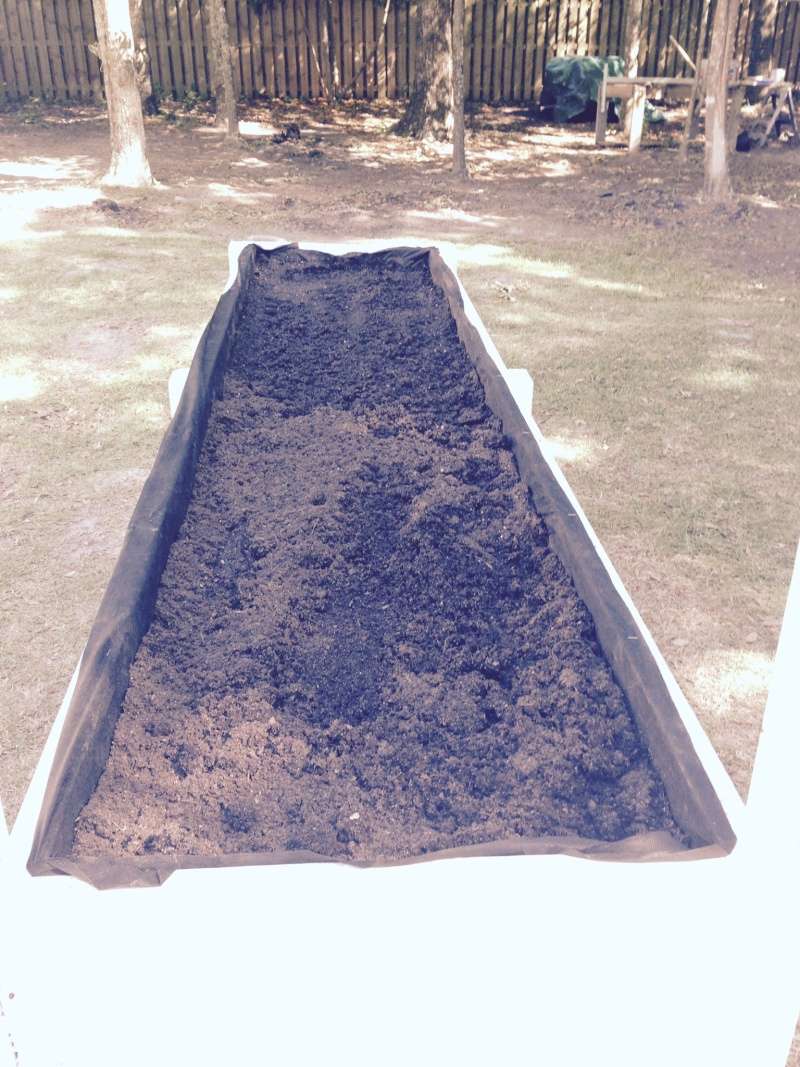
Next, I had to add the compost. That is where I ran into a slight issue. I had all my compost (cow & hen manure and leaf & mushroom) mixed up and in my wheelbarrow under a tarp. Apparently, tarps are water resistant and NOT water-proof, therefore, all the rain had soaked thru the tarp and saturated the compost. There was standing water and the manure became, shall we say, fragrant.
I figured it was still ok to use and that the aroma would dissapate over time when it was mixed into the rest of the MM. Was I correct?
Well I went ahead and screened the compost into the MM. Because it was soaked, it did not want to go thru the screen easily so I had to use the hose sprayer and got it in that way. As a result, there was a lot of water in the box and it wasn't draining even though I had put in 1 1/4" drainage hole per square through the plastic liner and the styrofoam.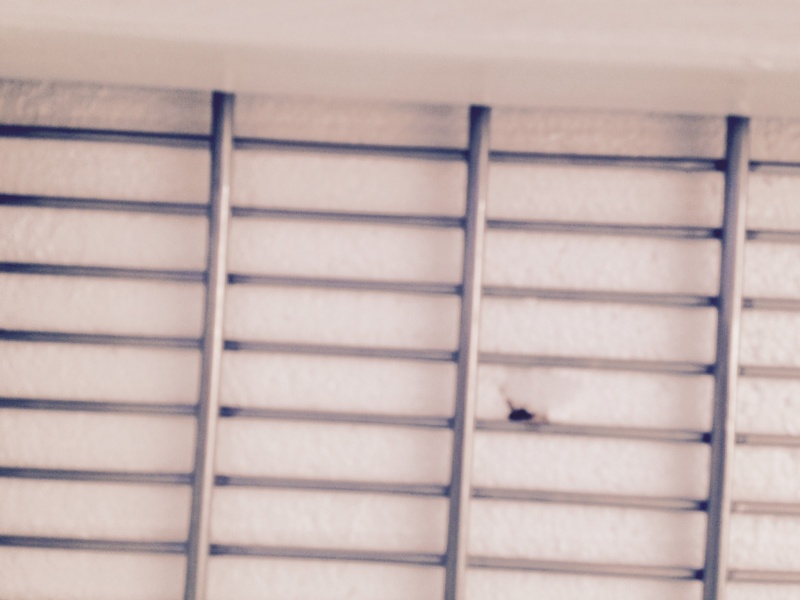
After some investigation, I found that although I did indeed put 1/4" holes in the foam, the foam had plugged the holes. Therefore, I had to make the holes in the foam bigger...next time, I think I will wait for the water to drain before enlarging the holes...no matter how long it takes because when the holes were cleared the water flowed much better.
Even after the water drained, the MM still pooled:
The original MM still had white specks in it which I presumed to be the medium Vermiculite I origianally used. I went ahead and added some coarse vermiculite to each box, about .5 cubic foot. But still the MM was not friable and the water did not drain well.
Next, I went ahead and added some peat moss, about 1.5 cubic feet per box. That was the amount need to bring the MM level to the top of the box. Also, now the MM felt alot more like it was supposed to. I was surprised by this as I thought the peat would last a lot longer than 5 years. Now I am wondering what the effect will be by adding the peat moss.
Here is the final product. I am going to try it to see how it does. If it does not produce well, than I will use it to fill some low spots in the yard and make a new batch for next season...here's to hoping it will work.

I already have a few plants that I can transplant, I had some left over plants from my 4x4 that I put in pots and I got 4 Roma Tomato plants for free from a young man dancing in the back of his truck with a sign saying "Free Tomato Plants" When I asked him what the deal was, he said he was looking for some "Good Karma." Hopefully it will work out for the both of us.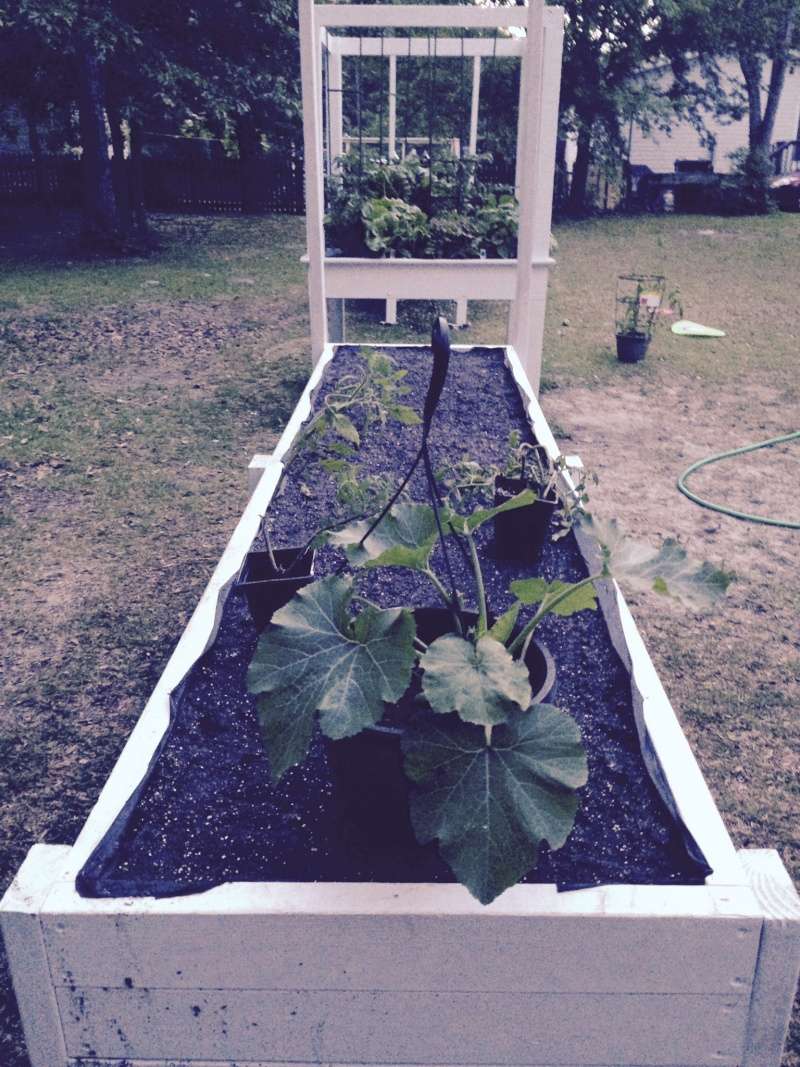
One last thing, here is a picture of one side of the UN-TREATED 2x6 box I put on the ground 5 years ago.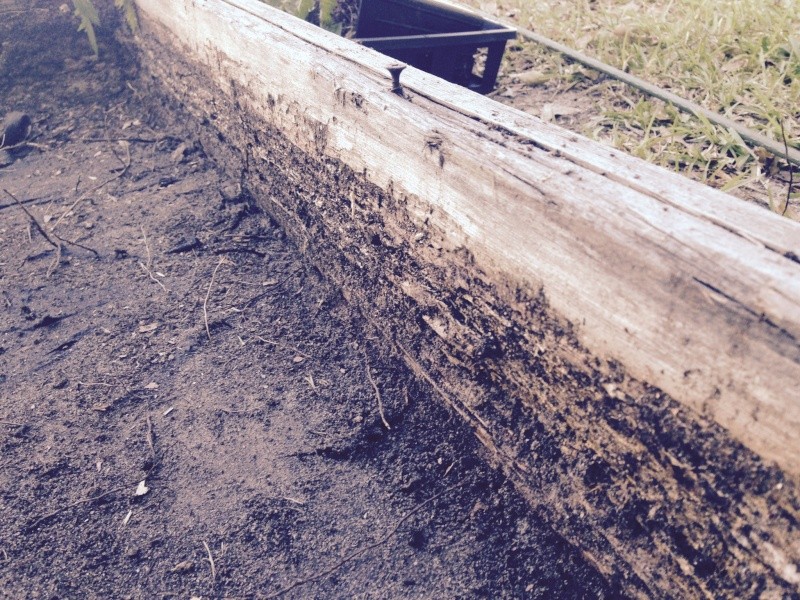
One more, one last thing...Here's a picture of my beans doing their thing in the 4x4: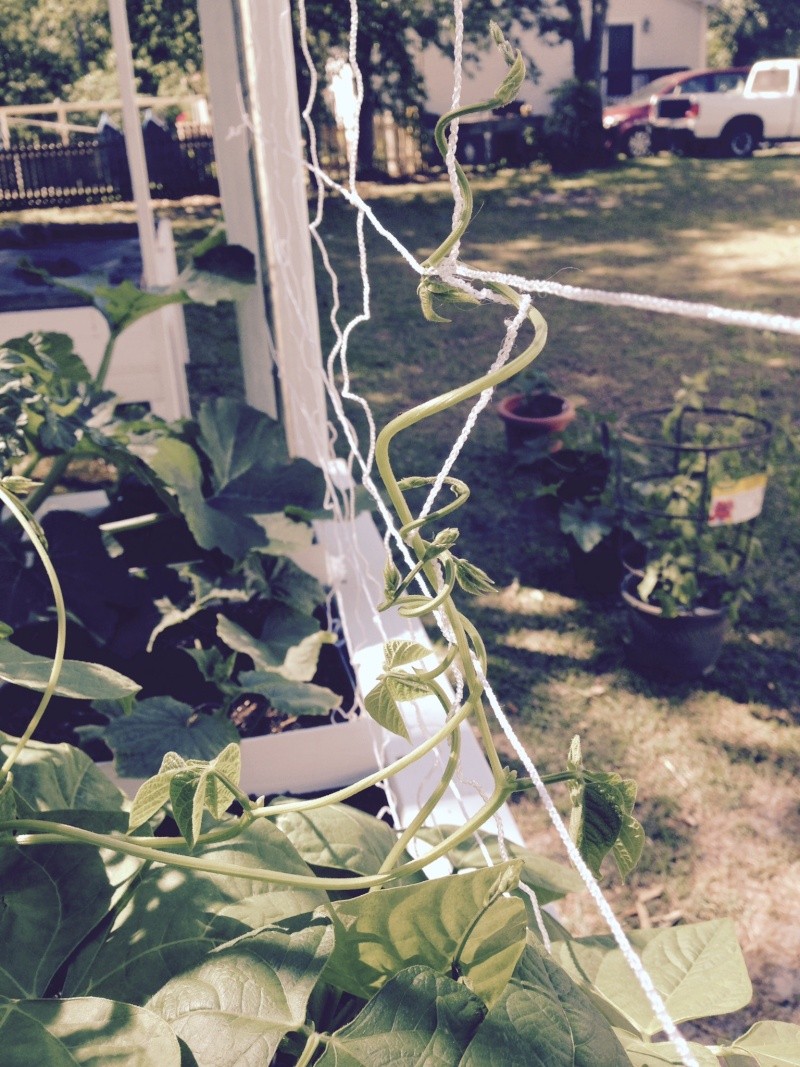
It is my understanding that the Vermiculite and Peat Moss would last a very long time and just the compost would have to be replenished. So I had to screen the MM to remove the roots, acorns, etc.
So now that I was able to get the beds done, I was able to finish screening the old MM from the ground beds.
After 1/2" screen:

After 1/4" screen:


My 1/4" screen setup:

Screened soil in the 2x8 - woohoo!!!

Next, I had to add the compost. That is where I ran into a slight issue. I had all my compost (cow & hen manure and leaf & mushroom) mixed up and in my wheelbarrow under a tarp. Apparently, tarps are water resistant and NOT water-proof, therefore, all the rain had soaked thru the tarp and saturated the compost. There was standing water and the manure became, shall we say, fragrant.
I figured it was still ok to use and that the aroma would dissapate over time when it was mixed into the rest of the MM. Was I correct?
Well I went ahead and screened the compost into the MM. Because it was soaked, it did not want to go thru the screen easily so I had to use the hose sprayer and got it in that way. As a result, there was a lot of water in the box and it wasn't draining even though I had put in 1 1/4" drainage hole per square through the plastic liner and the styrofoam.

After some investigation, I found that although I did indeed put 1/4" holes in the foam, the foam had plugged the holes. Therefore, I had to make the holes in the foam bigger...next time, I think I will wait for the water to drain before enlarging the holes...no matter how long it takes because when the holes were cleared the water flowed much better.

Even after the water drained, the MM still pooled:

The original MM still had white specks in it which I presumed to be the medium Vermiculite I origianally used. I went ahead and added some coarse vermiculite to each box, about .5 cubic foot. But still the MM was not friable and the water did not drain well.
Next, I went ahead and added some peat moss, about 1.5 cubic feet per box. That was the amount need to bring the MM level to the top of the box. Also, now the MM felt alot more like it was supposed to. I was surprised by this as I thought the peat would last a lot longer than 5 years. Now I am wondering what the effect will be by adding the peat moss.
Here is the final product. I am going to try it to see how it does. If it does not produce well, than I will use it to fill some low spots in the yard and make a new batch for next season...here's to hoping it will work.


I already have a few plants that I can transplant, I had some left over plants from my 4x4 that I put in pots and I got 4 Roma Tomato plants for free from a young man dancing in the back of his truck with a sign saying "Free Tomato Plants" When I asked him what the deal was, he said he was looking for some "Good Karma." Hopefully it will work out for the both of us.

One last thing, here is a picture of one side of the UN-TREATED 2x6 box I put on the ground 5 years ago.

One more, one last thing...Here's a picture of my beans doing their thing in the 4x4:


ralitaco-
 Posts : 1303
Join date : 2010-04-04
Location : Southport , NC
 Re: Adventures in Table Top
Darn, that would've been too easyboffer wrote:I'm not aware of a database.
I just wanted to be able to quickly look at an alphabetical list of what I want to plant and quickly see the spacing.
I knew about the spacing thing but sometimes that info isn't available on transplants or if you don't have the seed packet.Generally, spacing in squares can be determined by using the recommended spacing on seed packages for maturing plants (sometimes called the 'thin-to' spacing).
(12÷seed spacing)2=number per square
I do like the forumula though.
I had heard that Rosemary can get very big, my sister had a bush one time.In my climate, rosemary is a perennial, and bigger than a determinate tomato plant. We have ours planted in an ornamental garden.
I can't help with the other herbs; my wife grows those in her ornamental beds.
Thanks Sanderson. Maybe, I will do the Rosemary in a large pot too.sanderson wrote:This is just my experience, probably not typical!
Thyme is so little so 4/sq (perennial in my area)
Basil can get big so 1 or 2/sq
Rosemary -ditto on what Boffer said. I have mine in a large pot as a perenial
Sage - pineapple sage 1/sq (I have mine in a large pot)
Regular sage - 1 or 2/sq
Dill - it can fan out at the top so again, mine are in pots.
Cilantro - I push the envelope and grow several seeds in one bunch. 1/sq
Coriander Cilantro- 3 or 4 seeds in one bunch and it really spread out and took over the back 40. The bees and wanna-bees loved the early flowers. This variety of cilantro bolts early and mine grew to over 2 ft high. Thank goodness I planted it in a spare 12" x 6" area at the edge of the box.

ralitaco-
 Posts : 1303
Join date : 2010-04-04
Location : Southport , NC
 Re: Adventures in Table Top
So I woke up this morning and had a minor epiphany...I had seeds stored from a couple of years ago! I got up, threw on some sweats and went outside and planted some seeds before I even brushed my teeth 
Since they were seeds and I had no plant markers ready, I took pictures of the packets in the squares where I planted them and marked the planted squares with nails to be able to identify them later when I had a chance to tag them.
I don't know if the seeds will work or not but I figured they were worth a try. If they produce, great, if not, at least it didn't cost me anything.
Basil, Oregano & Rosemary (1 sqare each, 1 per square); Onions ( 1 square, 16 per square); Carrots (1 square, about 50...the package said thin to 1" so that would be 144 in 1 square, I didn't do THAT many, but don't know how many I did)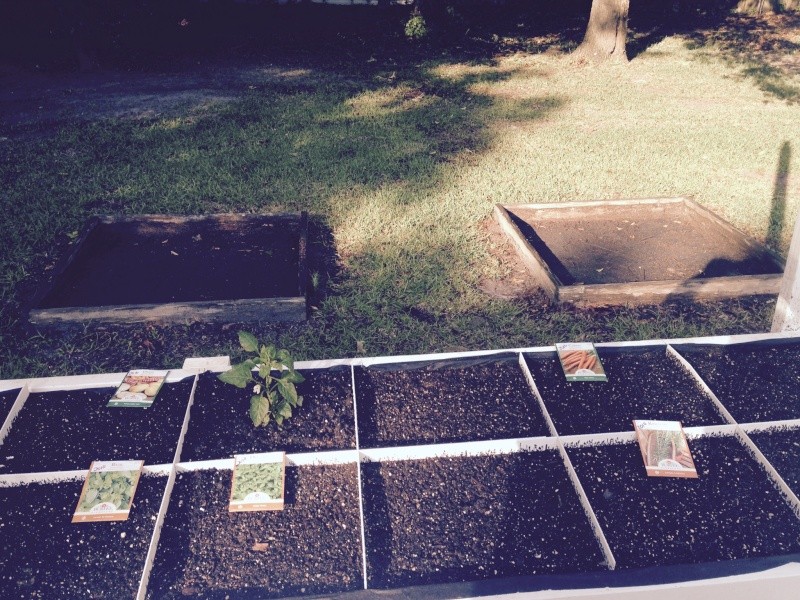
Lima Beans (2 squares, 4 per square)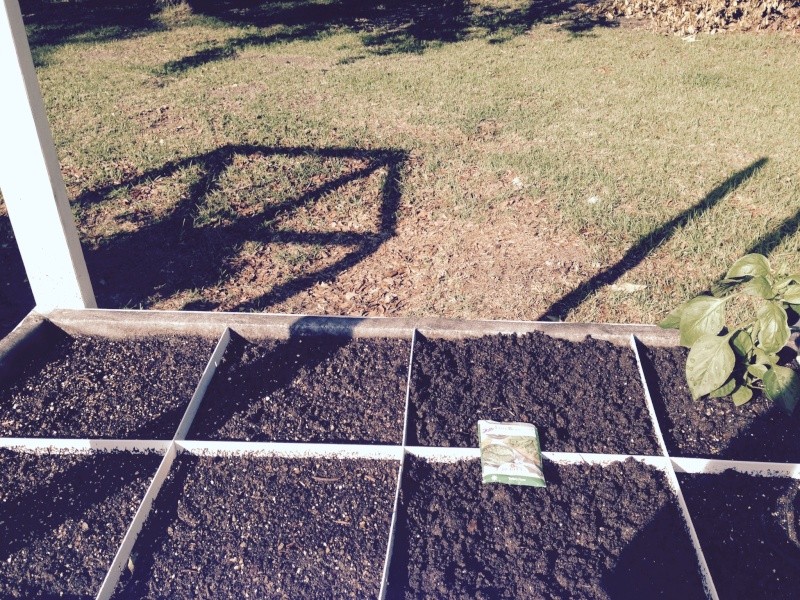
every thing is supposed to start popping up in about 3 weeks, time will tell.

Since they were seeds and I had no plant markers ready, I took pictures of the packets in the squares where I planted them and marked the planted squares with nails to be able to identify them later when I had a chance to tag them.
I don't know if the seeds will work or not but I figured they were worth a try. If they produce, great, if not, at least it didn't cost me anything.
Basil, Oregano & Rosemary (1 sqare each, 1 per square); Onions ( 1 square, 16 per square); Carrots (1 square, about 50...the package said thin to 1" so that would be 144 in 1 square, I didn't do THAT many, but don't know how many I did)

Lima Beans (2 squares, 4 per square)

every thing is supposed to start popping up in about 3 weeks, time will tell.

ralitaco-
 Posts : 1303
Join date : 2010-04-04
Location : Southport , NC
 Re: Adventures in Table Top
Only a gardener would rush outside to plant seeds like that!  Taking a photo was a smart idea! With everyone having cell phones, there is no reason not to know where something is planted. Now, where did I plant the . . .
 Kudzu Bugs & Harbor Freight Drip irrigation
Well, I think ONLY a gardener and his daughter would be outside at 8 am picking Kudzu Bugs off their pole bean plants.sanderson wrote:Only a gardener would rush outside to plant seeds like that!
 (this is not my photo, but this is what they looked like on my plants)
If you don't have these rascals in your area, you are lucky. We must've spent an hour picking them off the vines and putting them into a bucket of hot soapy water. The next day (this a.m.) they were back again, maybe not as many, but still a bunch; so, there I was picking them off again. 12 hours later, a new herd was in place. It does seem to be fewer but my word, they are annoying. I am starting to consider that mosquito netting I saw HAS talking about.
I also had what I believe to be a grasshopper on my cucumber leaf, if it's not a grasshopper, please let me know:

So thank to SFG, I have been introduced to Hornworms and now Kudzu Bugs. I knew picking up a hobby would get me some new friends, I just didn't realize some of them would be creepy crawly.
Well, the zucchini is thriving. Again, I thought they grew on vines, but this appears to be a bush:

That is my wife's hand on one of the leaves. I am wondering if I can cut off any of the leaves or if I can cage them to try to control them.
On a different note, I stopped by a Harbor Freight store today. (To me they are a man's version of Bath and Body Works because they send me coupons and since I had a coupon, I had to stop by...) Anyway, while there, I stumbled on a couple of neat items for the garden for cheap. Now I know "you get what you pay for" but I figured it was worth a try...
They had these Watering Cones.
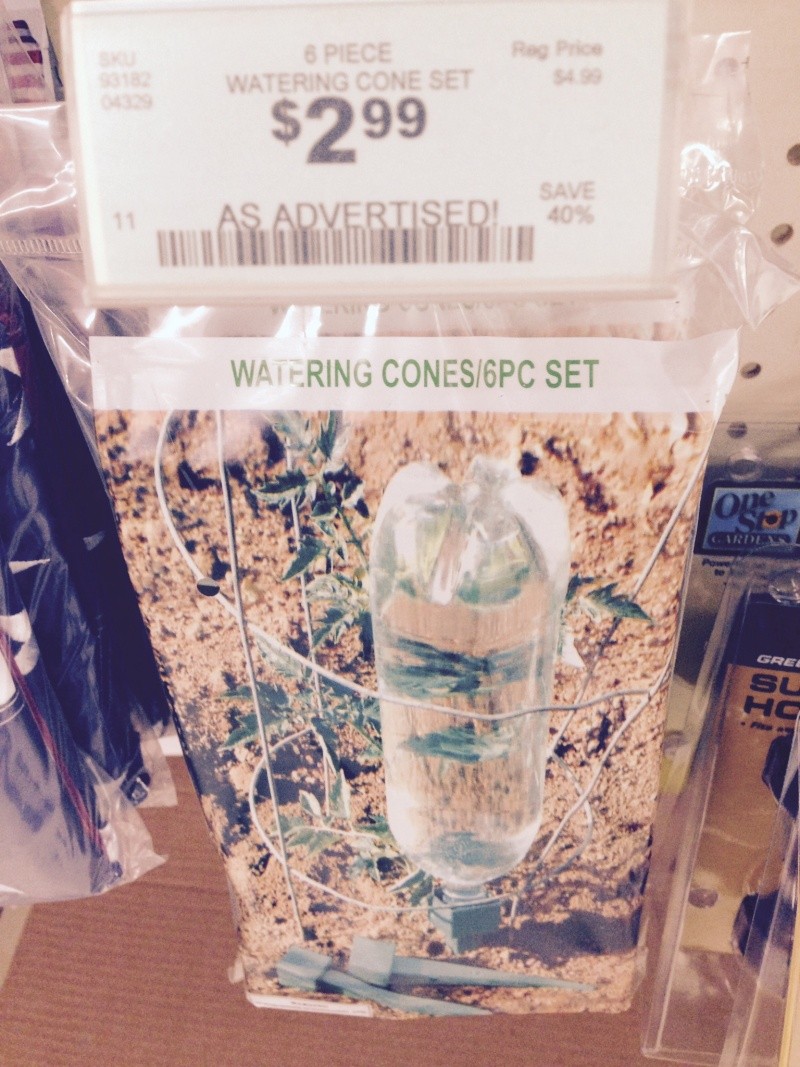
Since they were only $3 for a 6 pack, I figured I give them a try. After reading some reviews online, I think I will need to add some sand into the cone so the water seeps out slower.
They also had a Watering Drip starter kit for $7, so I figured what the heck. I know lots of folks use the drip systems on their beds, so for the price I thought I could experiment a little. And yes, I know it's HF and you get what you pay for, but I figure if I'm going to mess up, I'd rather it be with a cheap kit than an expensive one.

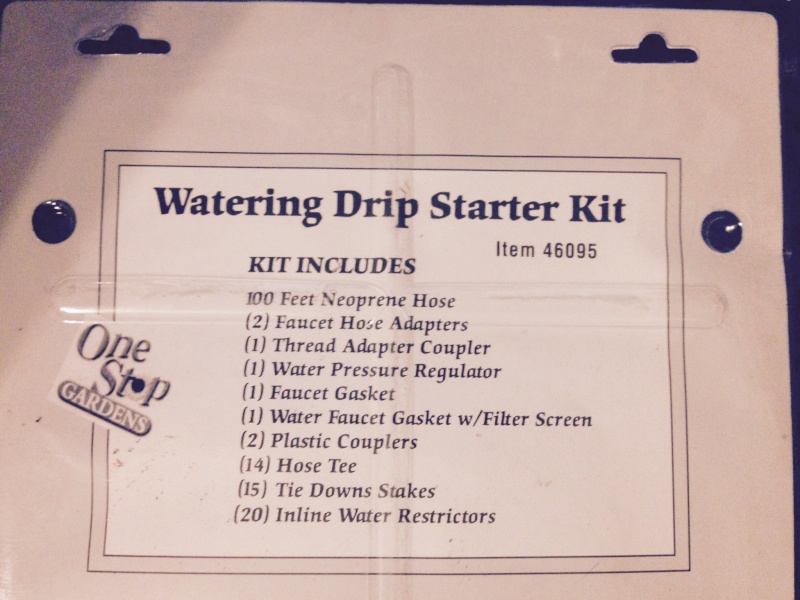

ralitaco-
 Posts : 1303
Join date : 2010-04-04
Location : Southport , NC
 Watering Cones
ralitaco wrote:Well, the zucchini is thriving. Again, I thought they grew on vines, but this appears to be a bush:
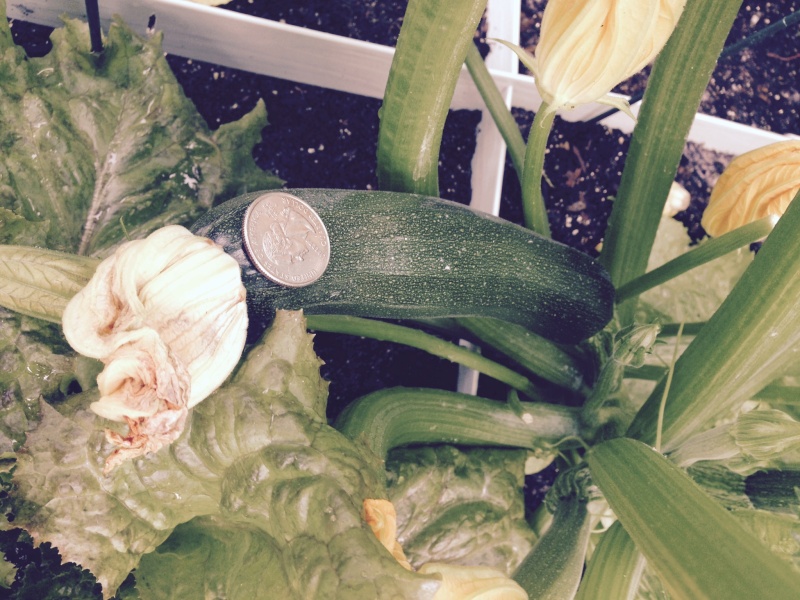
Almost ready to pick...WOOHOO!!!
So I tried one of them, I filled a 2L bottle with water, slid it onto the cone, stuck it in the soil and about 2 minutes later it was empty. Since it is not a tight fit, I had the water coming out the top of the cone along with the holes and I could see the air bubbles.ralitaco wrote:On a different note, I stopped by a Harbor Freight store today.
They had these Watering Cones.
Since they were only $3 for a 6 pack, I figured I give them a try. After reading some reviews online, I think I will need to add some sand into the cone so the water seeps out slower.
Wanting to prevent the water from coming out the top, I put 2 layers of 6-mil plastic over the bottle tip and cut an "X" in it so the water could come out. I then pushed the cone on top of that and it fit nice and snug. I turned it over and the water did come out the holes. I then inserted it into the MM and it took several hours to drain.
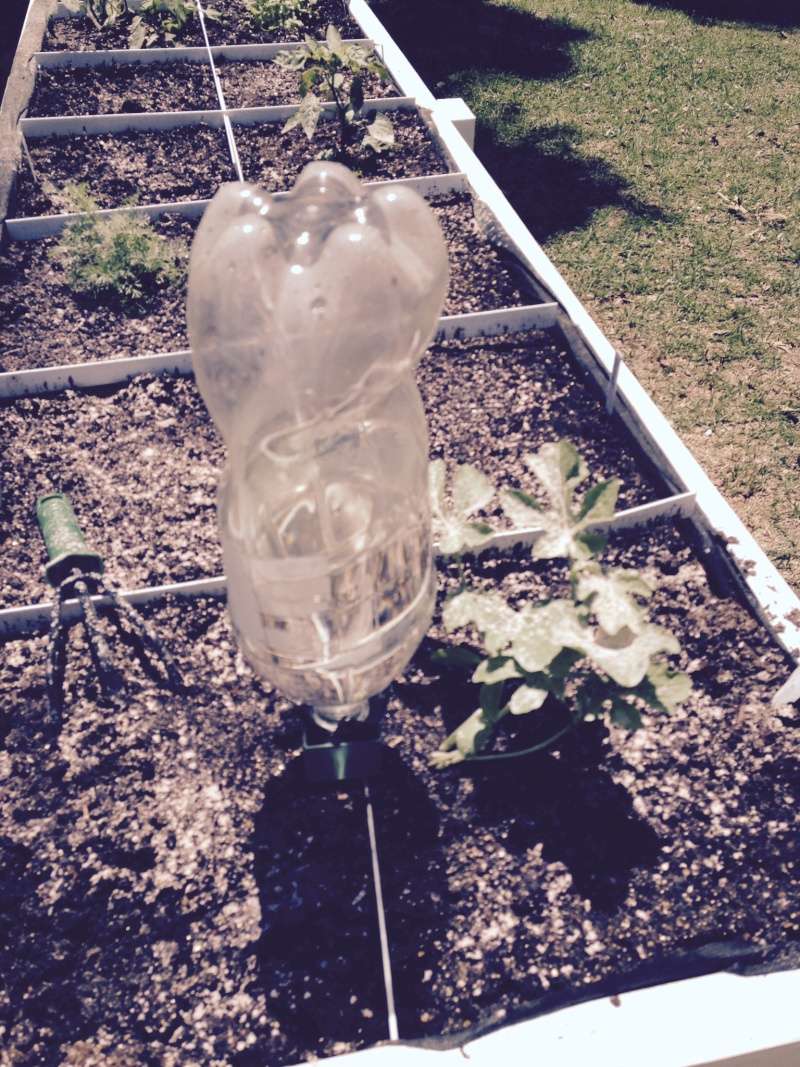
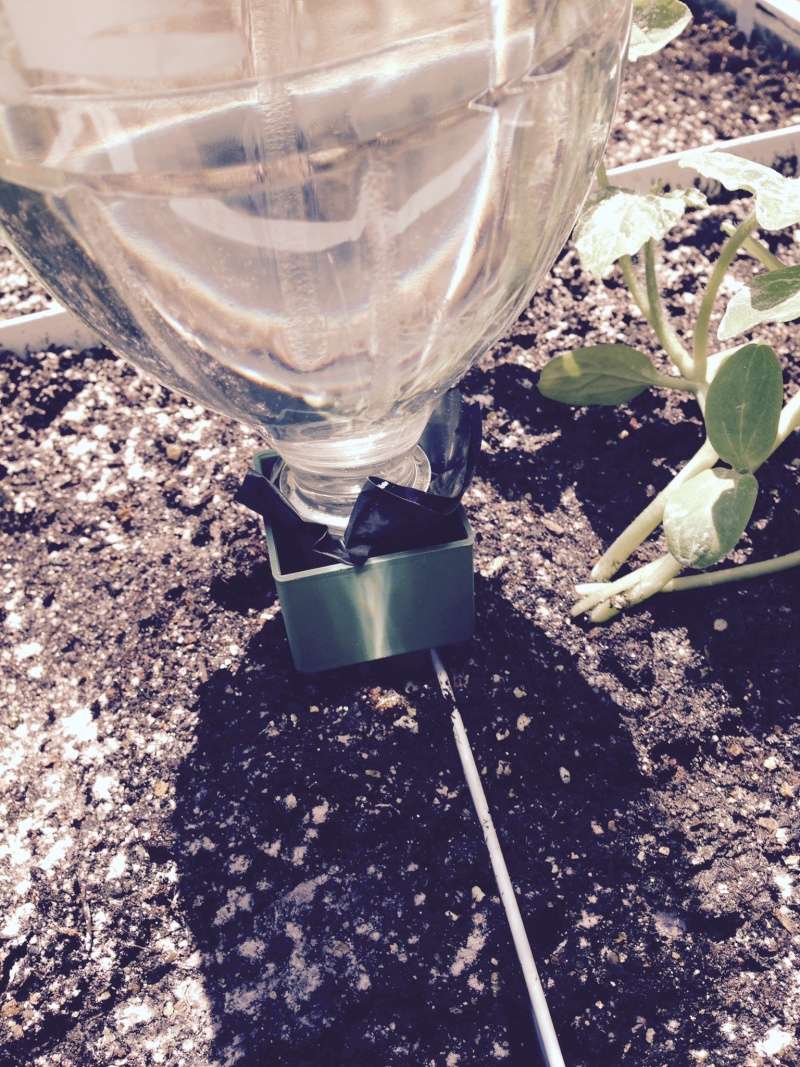
So here is my question: I understand that when it comes out fast, the water is getting right to the roots and not watering weeds, what would the benefit be of letting the water slowly drain from the bottle?
Also, Here is picture of how I lifted the tabletop bed to remove the bricks I had under the legs so I could paint them.
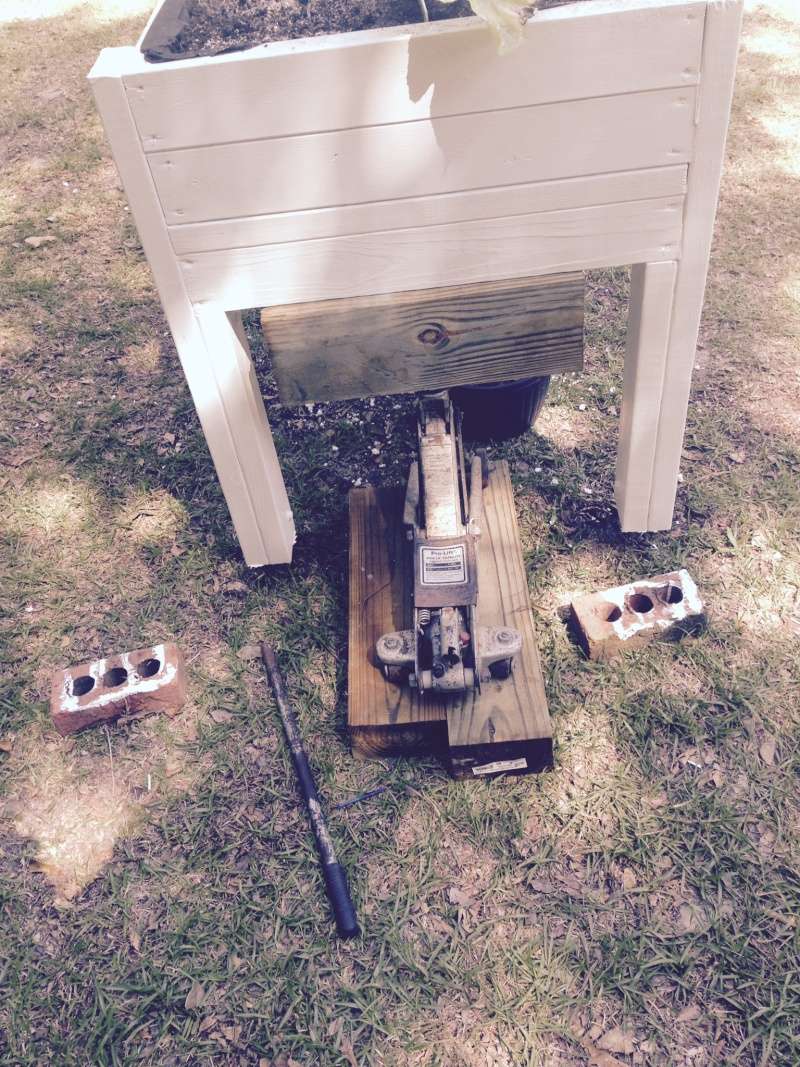
Latest pictures of my 4x4 progress:
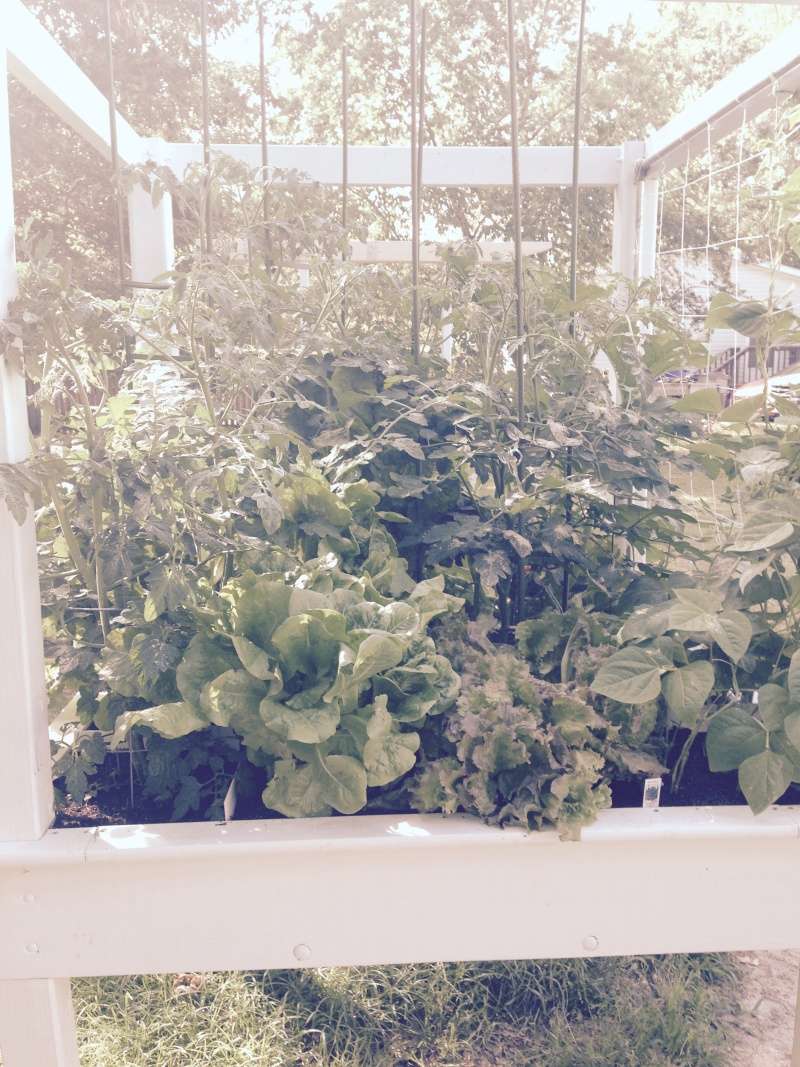
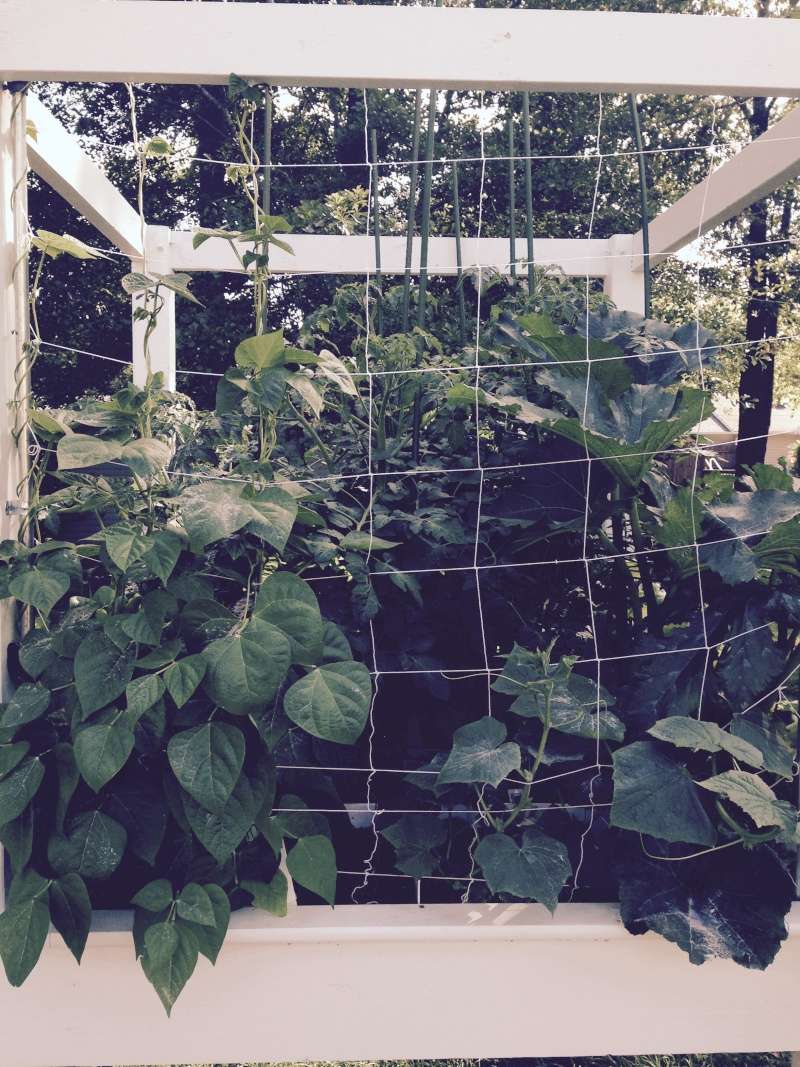
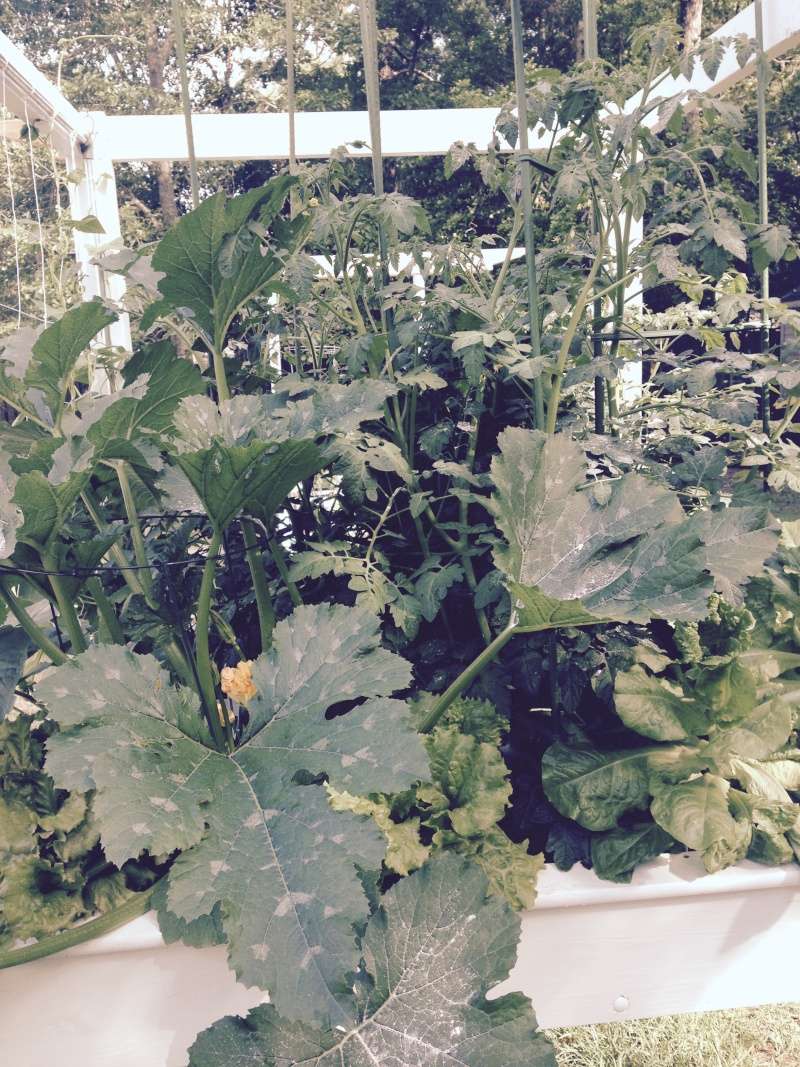

(FYI-The white powder on the zucchini leaves is Sevin Dust...I got tired of hand picking kudzu bugs and then I saw fire ants)
Last edited by ralitaco on 5/28/2015, 8:23 am; edited 1 time in total (Reason for editing : added pictures)

ralitaco-
 Posts : 1303
Join date : 2010-04-04
Location : Southport , NC
 Trellis
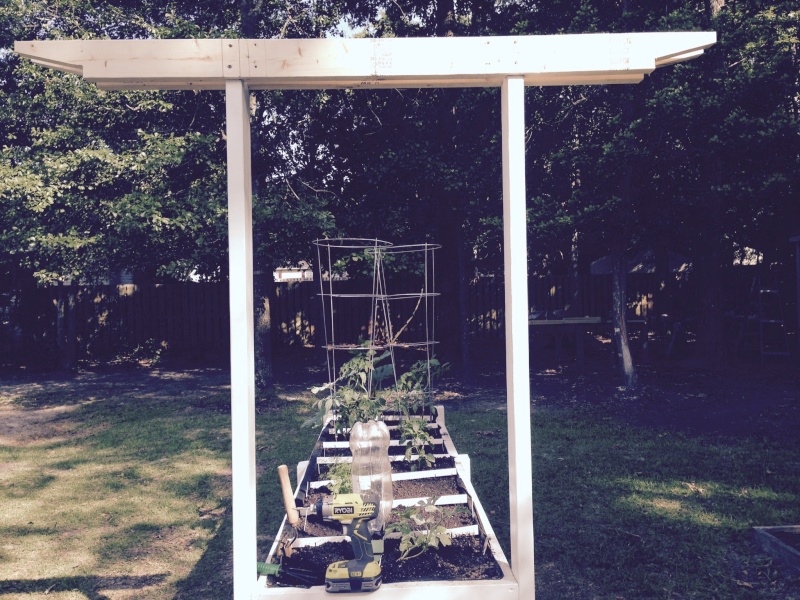
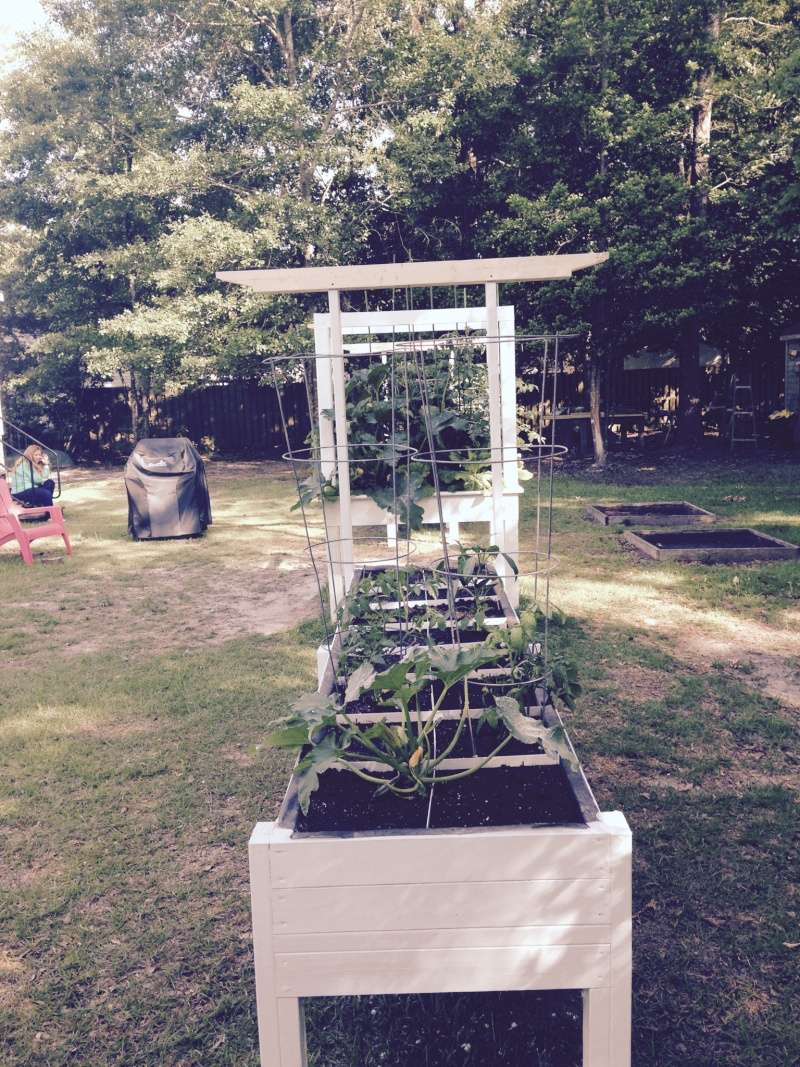
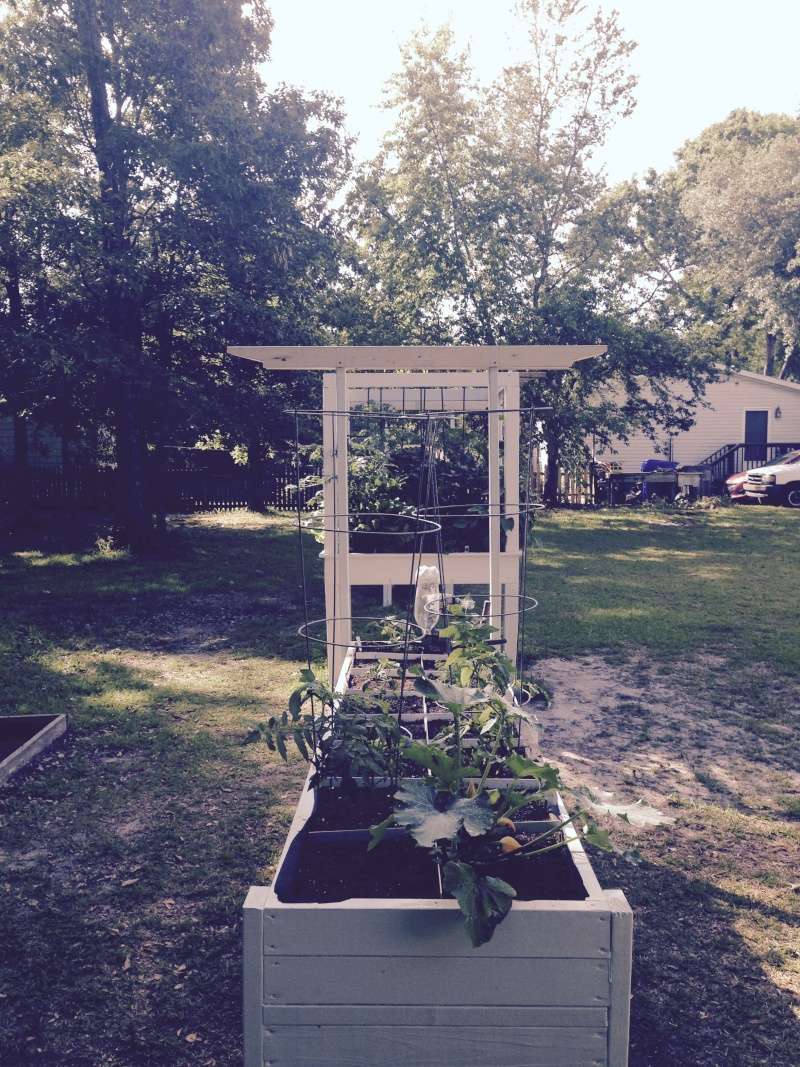
I have started working on my trellis/pergola...yea! I have everything cut now and ready to be painted. I also had to level my boxes because while the INDIVIDUAL boxes were level, they were not all level with each other. One 2x8 needed to go down 1.5" and the other needed to come up about 3.5".
Here are some pictures of my trellis / pergola.
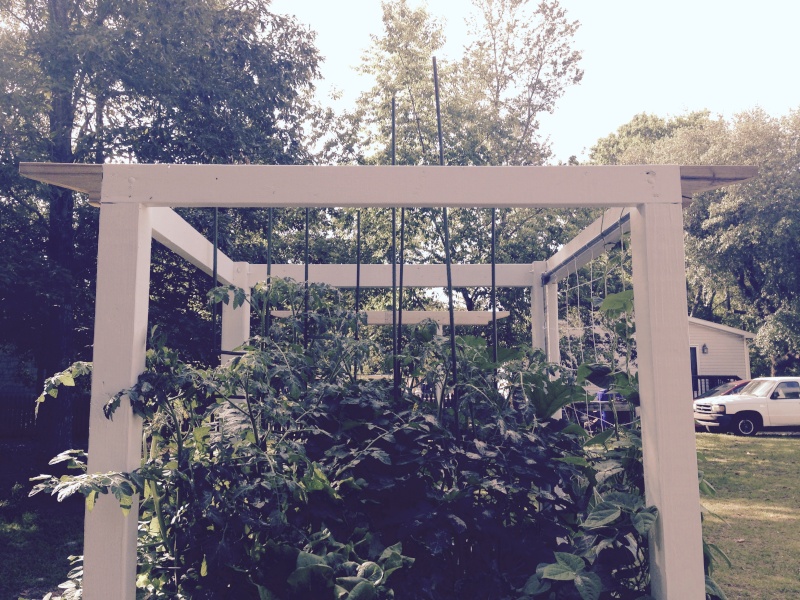
I just added the "ends"

Here are some pictures of my trellis / pergola.

I just added the "ends"


ralitaco-
 Posts : 1303
Join date : 2010-04-04
Location : Southport , NC
 Re: Adventures in Table Top
Your table top garden looks so healthy! You certainly have my attention on the HF watering cones. Slow dripping allows the water to absorb laterally. I think I will take a little drive over to HF and look around. Maybe it will be my new store!
 Re: Adventures in Table Top
Ralitaco, Harbor Freight watering cones. Yep, bought 2 packs. Need to tweak them to empty slower, but they do work. $2.99 per pack.
 Re: Adventures in Table Top
I put 2 layers of 6-mil plastic on top of the bottle and cut an X in that so the water could come out.sanderson wrote:Ralitaco, Harbor Freight watering cones. Yep, bought 2 packs. Need to tweak them to empty slower, but they do work. $2.99 per pack.
I have read online some folks filled the cones with sand to slow the water, too.
Good luck

ralitaco-
 Posts : 1303
Join date : 2010-04-04
Location : Southport , NC
 Re: Adventures in Table Top
I was able to get out and work on my Trellis / Pergola again last night.
I got the boards cut and primed. The cross pieces are attached but the rafters are just sitting there for now (I needed more screws). I went with un-finished 2x4's (mainly to save a few bucks) and painted them with an exterior latex paint. All of them need another coat of paint, but at least I was smart enough to put 2 coats on the cross pieces that are facing each other.
I cut the ends of the wood down 1" from the top and up 1" from the bottom with the marks 6" apart: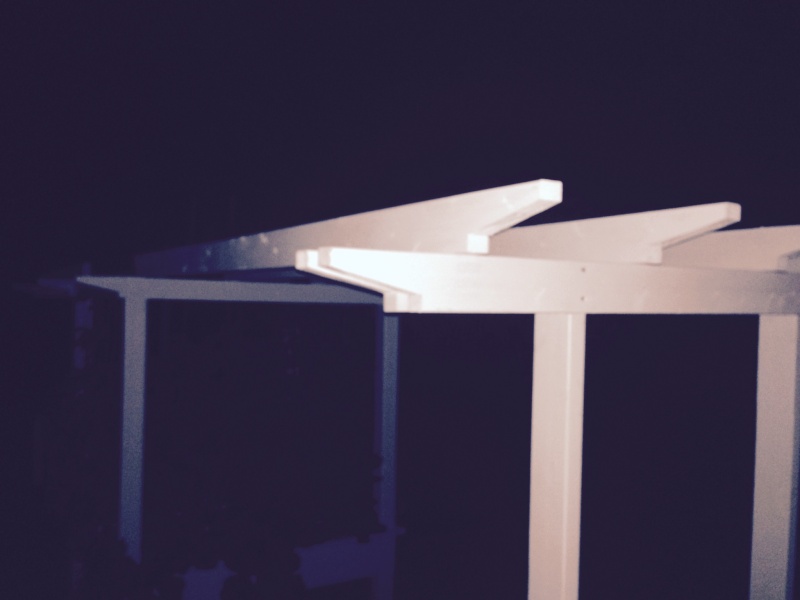
It's a bit hard to see in the photos, but I attached the cross pieces in a double fashion 1.5" apart. They are 65" across the top and 53" across the bottom.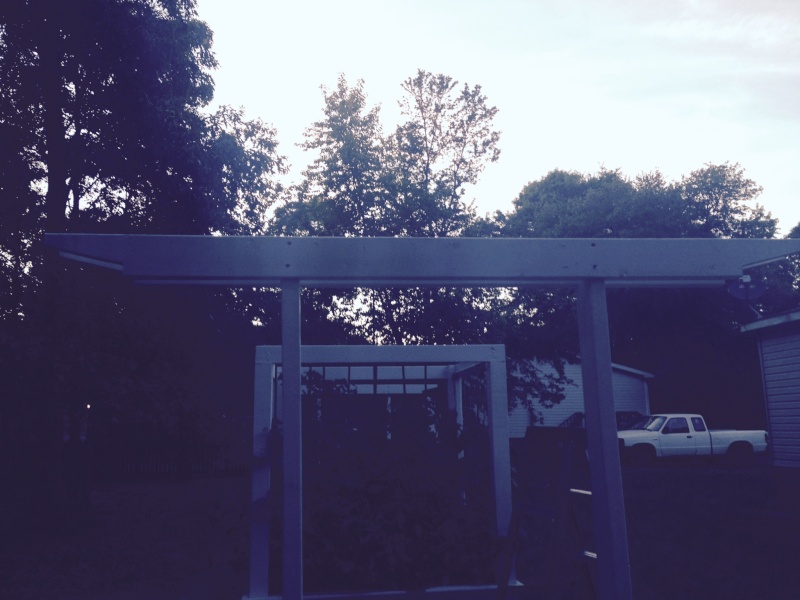
I then positioned the Rafters over a 48" span with a 14" gap between them. The ends on the 4x4 box are flush with the top band and the ends on the 2x8 box ovehang 1" on the bottom: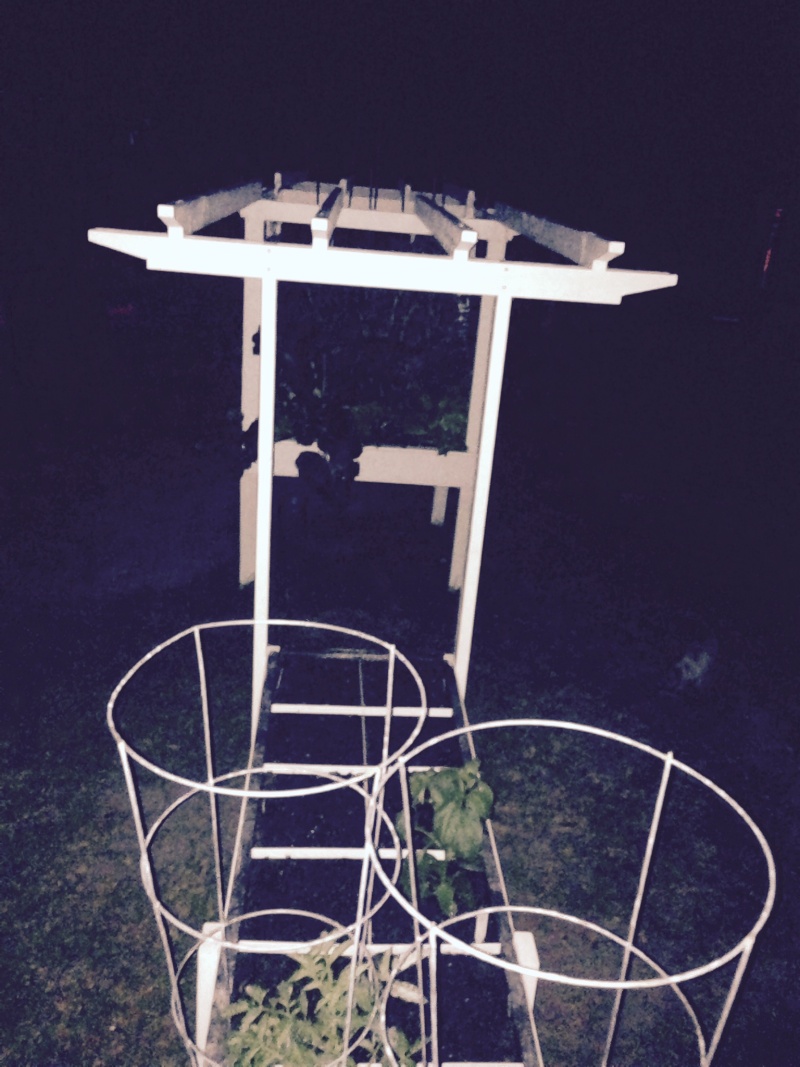
Next time, I might let the ends hang over a bit more on the 2x8 boxes, but moving the boxes even another 1-2" was too much work.
The view from the landing at my back door:
The view from the future fire pit, picnic table sitting area: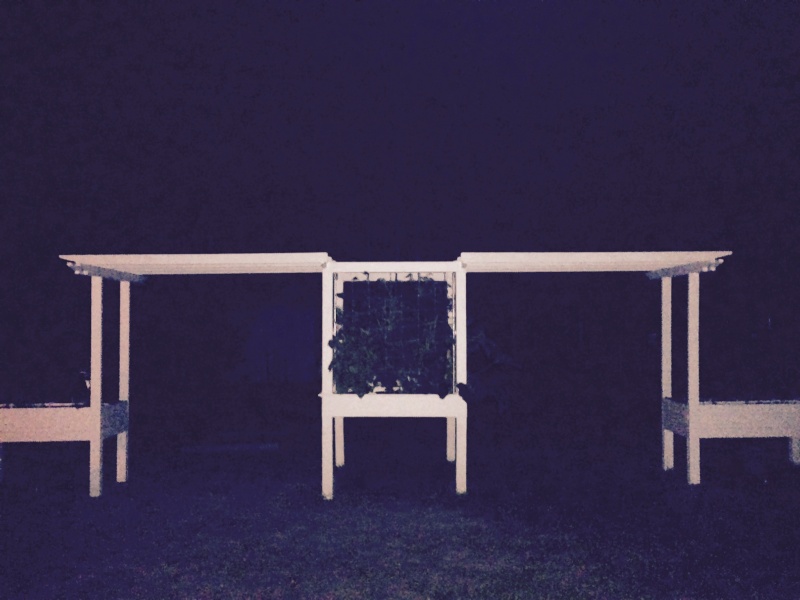
I plan to put another band around the inside of the rafter ends on the 4x4 bed to give it a finished look. Then I am thinking about putting some type of top on the 4x4 that would still let in the sun but that would allow me to cover it with plastic or toule (sp?). I may even look for a weather vane or something to put on the top center of the 4x4.
I'm not sure how long they will last, but I can replace them later if need be. I am looking at running a 2x4 or 4x4 fence panel on top of the rafters for the beans, etc to have something to wrap around. I also believe I need to put on some 1x2 or 2x2's on top to prevent twisting of the rafters. Before I screw the rafters in place, I am going to test cut a routed edge on scrap 2x4 to see how I like the look...ok, ok, to see how my DW likes the look
More pictures in the daylight coming soon.
I guess this year is the construction year and maybe next year I can focus more on the plants.
I got the boards cut and primed. The cross pieces are attached but the rafters are just sitting there for now (I needed more screws). I went with un-finished 2x4's (mainly to save a few bucks) and painted them with an exterior latex paint. All of them need another coat of paint, but at least I was smart enough to put 2 coats on the cross pieces that are facing each other.
I cut the ends of the wood down 1" from the top and up 1" from the bottom with the marks 6" apart:

It's a bit hard to see in the photos, but I attached the cross pieces in a double fashion 1.5" apart. They are 65" across the top and 53" across the bottom.

I then positioned the Rafters over a 48" span with a 14" gap between them. The ends on the 4x4 box are flush with the top band and the ends on the 2x8 box ovehang 1" on the bottom:

Next time, I might let the ends hang over a bit more on the 2x8 boxes, but moving the boxes even another 1-2" was too much work.
The view from the landing at my back door:

The view from the future fire pit, picnic table sitting area:

I plan to put another band around the inside of the rafter ends on the 4x4 bed to give it a finished look. Then I am thinking about putting some type of top on the 4x4 that would still let in the sun but that would allow me to cover it with plastic or toule (sp?). I may even look for a weather vane or something to put on the top center of the 4x4.
I'm not sure how long they will last, but I can replace them later if need be. I am looking at running a 2x4 or 4x4 fence panel on top of the rafters for the beans, etc to have something to wrap around. I also believe I need to put on some 1x2 or 2x2's on top to prevent twisting of the rafters. Before I screw the rafters in place, I am going to test cut a routed edge on scrap 2x4 to see how I like the look...ok, ok, to see how my DW likes the look
More pictures in the daylight coming soon.
I guess this year is the construction year and maybe next year I can focus more on the plants.

ralitaco-
 Posts : 1303
Join date : 2010-04-04
Location : Southport , NC
 Zucchini
I got so caught up in my pergola, that I forgot to post this: 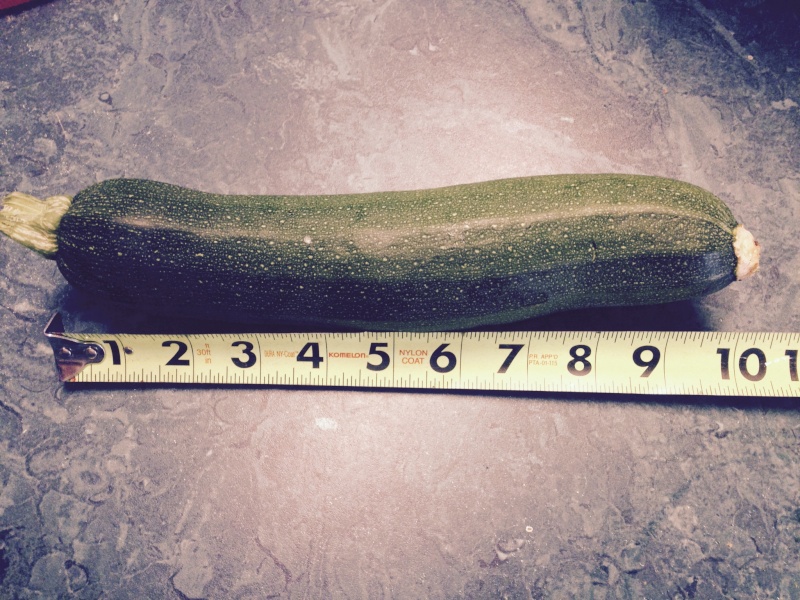
MY FIRST ZUCCHINI !!!!!!!!!!!!
I swear this thing grew 2 or 3 inches overnight

MY FIRST ZUCCHINI !!!!!!!!!!!!
I swear this thing grew 2 or 3 inches overnight

ralitaco-
 Posts : 1303
Join date : 2010-04-04
Location : Southport , NC
 Re: Adventures in Table Top
I love your new garden structures. Isn't it fun dreaming up and then making a one of a kind project like this. I found the planning and making the trellis and beds to be one of the most enjoyable parts of the gardening process.
How about some hanging baskets of flowers or trailing tomatoes hanging from the top ends of the pergola.
How about some hanging baskets of flowers or trailing tomatoes hanging from the top ends of the pergola.

yolos-
 Posts : 4139
Join date : 2011-11-20
Age : 74
Location : Brooks, Ga Zone 7B/8A
 Re: Adventures in Table Top
Thank you. The hanging baskets are coming...I am going to run a piece of conduit thru to hang the baskets...and now I have to look up "Trailing Tomatoes"yolos wrote:How about some hanging baskets of flowers or trailing tomatoes hanging from the top ends of the pergola.
My daughter wants to put have an outdoor screen suspended from them so we can watch movies outside...hmmmm


ralitaco-
 Posts : 1303
Join date : 2010-04-04
Location : Southport , NC
 Re: Adventures in Table Top
ralitaco wrote:Thank you. The hanging baskets are coming...I am going to run a piece of conduit thru to hang the baskets...and now I have to look up "Trailing Tomatoes"yolos wrote:How about some hanging baskets of flowers or trailing tomatoes hanging from the top ends of the pergola.
My daughter wants to put have an outdoor screen suspended from them so we can watch movies outside...hmmmm
I got the name wrong. It is topsy turvy tomato (or any other plant). Here are some images.
https://www.google.com/search?q=topsy+turvy+tomato&biw=1219&bih=804&tbm=isch&tbo=u&source=univ&sa=X&ei=ELJoVeKZGsXfsASRwoOACg&ved=0CFUQsAQ

yolos-
 Posts : 4139
Join date : 2011-11-20
Age : 74
Location : Brooks, Ga Zone 7B/8A
 Re: Adventures in Table Top
It's looking beautimus! And will get even more so when it's full of green stuff! 
The real challenge will come next year, when you go to expand, and try to match/complement what you have now.

The real challenge will come next year, when you go to expand, and try to match/complement what you have now.
 Re: Adventures in Table Top
Thanks, Boffer.
I am not done with this year's building yet and I have already started thinking about next year. My DW wants some Muscadine grapes so I have to plan a trellis or two for them. Then I was looking at all the trees in the yard and thinking which ones need to come down to make room for more TT's. I was also starting to think about shade tolerant veggies...I guess it's official, I'm hooked!
Here are some pictures, this time in the daylight.
This one shows the spacing of the double support:
Here's a bit closer look at the "add-on" ends on top of my original 4x4. Also you can see where I want to put the band to cover the ends: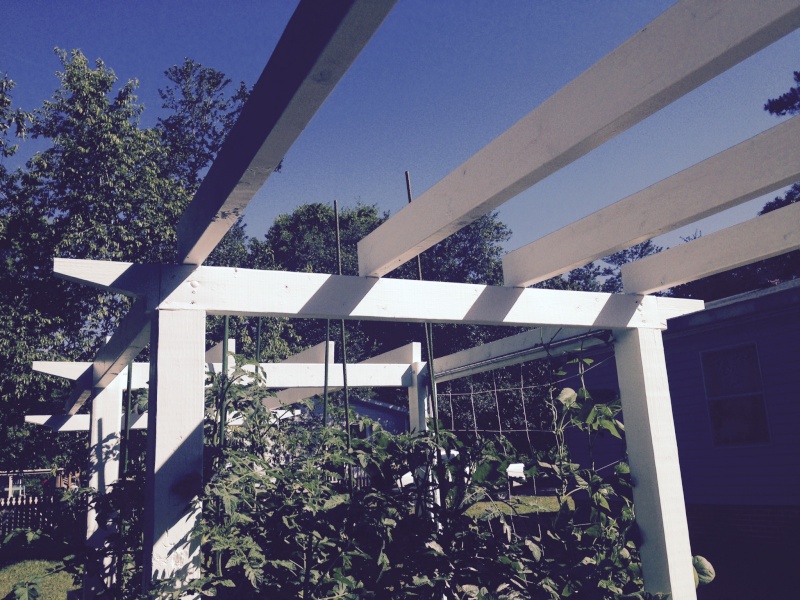
Just a picture from underneath...this is more a before photo than anything. I still have to add the slats on top and the 2"x3" fencing for the plants to hang onto: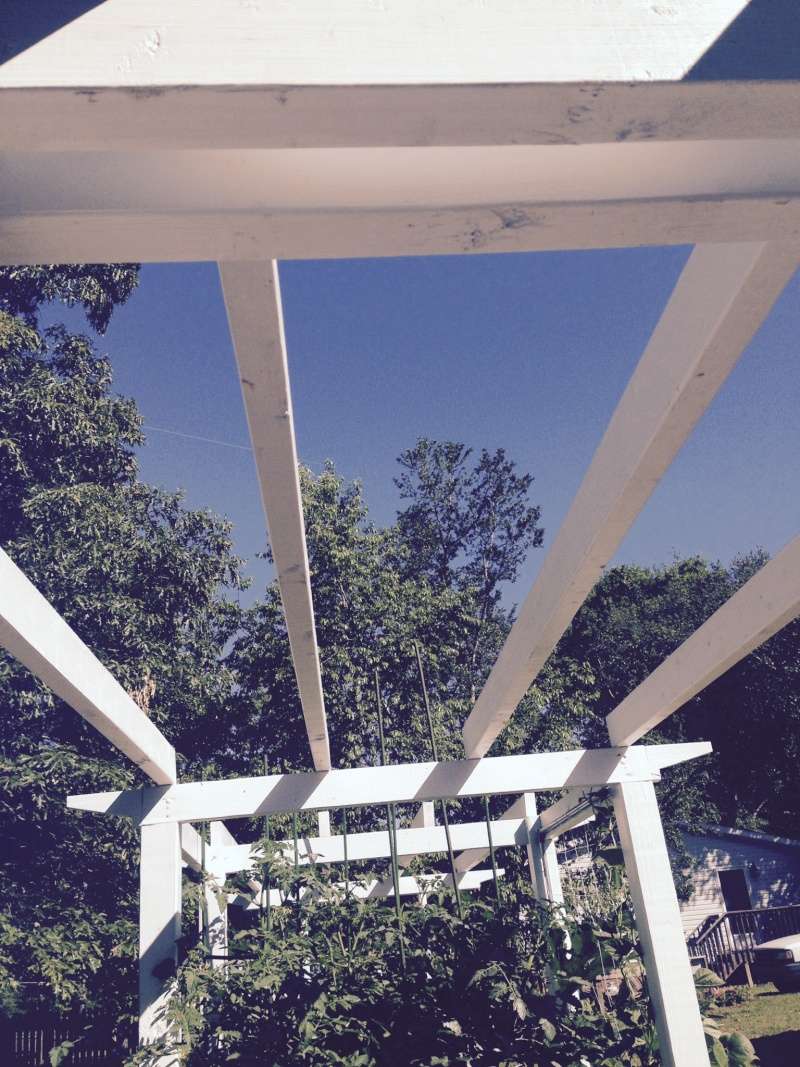
Here are some shots from either end: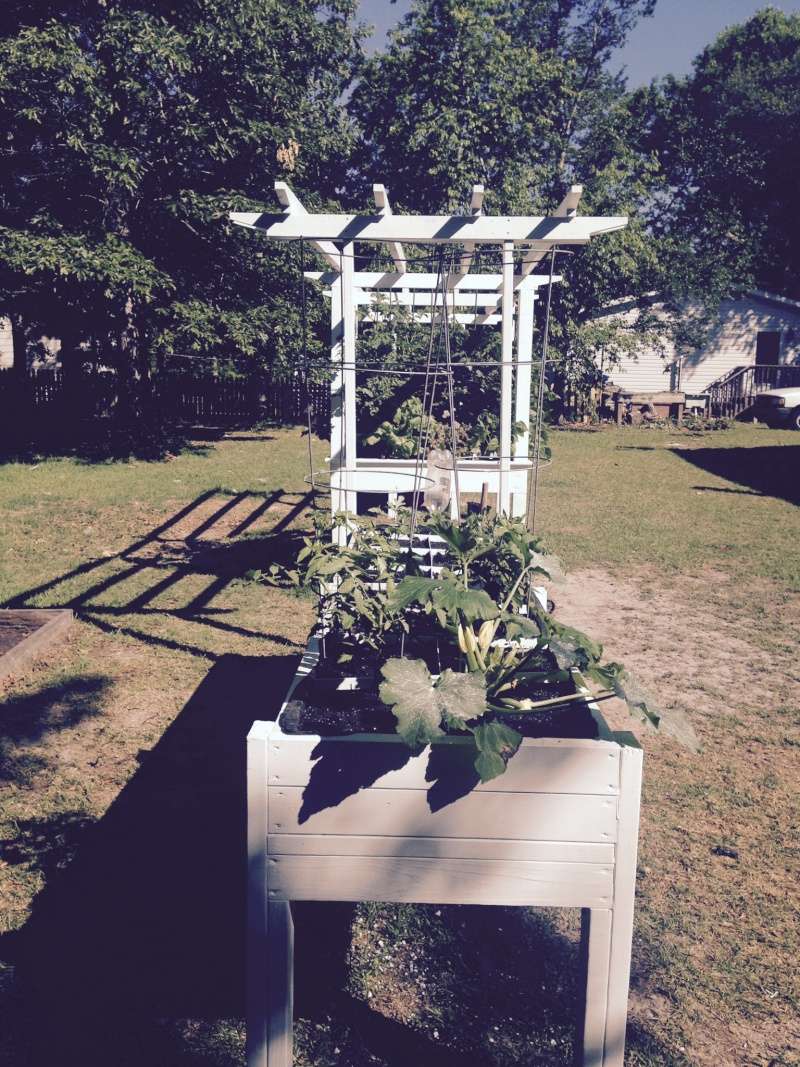

Lastly, from the landing at the back door: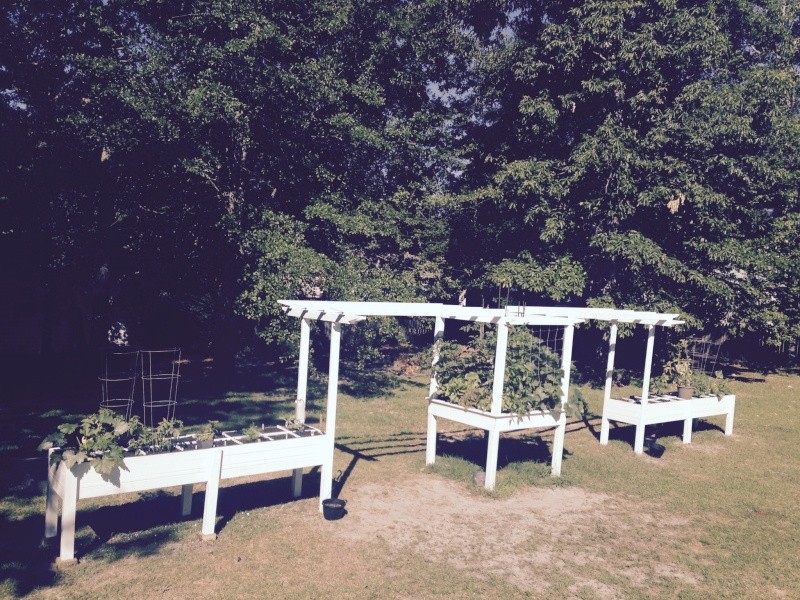
I am not done with this year's building yet and I have already started thinking about next year. My DW wants some Muscadine grapes so I have to plan a trellis or two for them. Then I was looking at all the trees in the yard and thinking which ones need to come down to make room for more TT's. I was also starting to think about shade tolerant veggies...I guess it's official, I'm hooked!
Here are some pictures, this time in the daylight.
This one shows the spacing of the double support:

Here's a bit closer look at the "add-on" ends on top of my original 4x4. Also you can see where I want to put the band to cover the ends:

Just a picture from underneath...this is more a before photo than anything. I still have to add the slats on top and the 2"x3" fencing for the plants to hang onto:

Here are some shots from either end:


Lastly, from the landing at the back door:


ralitaco-
 Posts : 1303
Join date : 2010-04-04
Location : Southport , NC
 Re: Adventures in Table Top
Regarding thyme and rosemary -- I found both can get pretty big. My thyme covered a square foot, and we have a rosemary bush growing wild on the side of a hill that is a few feet wide.
There are so many different kinds of thyme that maybe some stay much smaller than mine got.
There are so many different kinds of thyme that maybe some stay much smaller than mine got.

Marc Iverson-
 Posts : 3637
Join date : 2013-07-05
Age : 63
Location : SW Oregon
 Re: Adventures in Table Top
Thanks Marc, I will probably pull up or transplant the herbs if they get too big. I just wanted to get them in.
Here's a link to a coupon for those watering cones...only 1.79.
http://widgets.harborfreight.com/wswidgets/common/displayCoupon.do?week=2215&campaign=c&page=coupon5b.html&cust=61507207212&keycode=1031&single=true&utm_medium=email&utm_campaign=2215c&utm_source=1031&cid=mEmail_s1031_c2215c
Here's a link to a coupon for those watering cones...only 1.79.
http://widgets.harborfreight.com/wswidgets/common/displayCoupon.do?week=2215&campaign=c&page=coupon5b.html&cust=61507207212&keycode=1031&single=true&utm_medium=email&utm_campaign=2215c&utm_source=1031&cid=mEmail_s1031_c2215c

ralitaco-
 Posts : 1303
Join date : 2010-04-04
Location : Southport , NC
 Re: Adventures in Table Top
Some more pictures of my ever-expanding project:
here is the the 2"x3" fencing that I put up top for the plant to grab onto:
Slats in place (I actually had this done last night but didn't like the spacing of the slats so I moved it 6" towards the 4x4):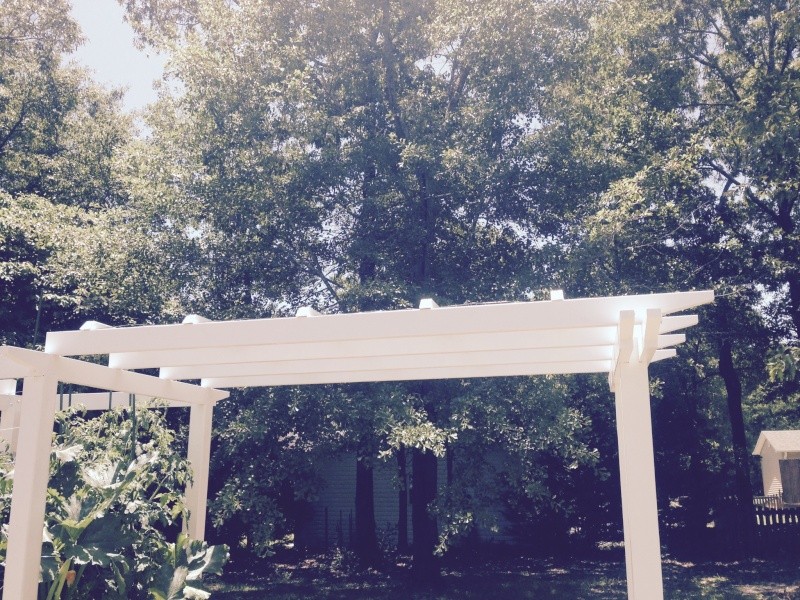
From the back door:
Closer look at the slats: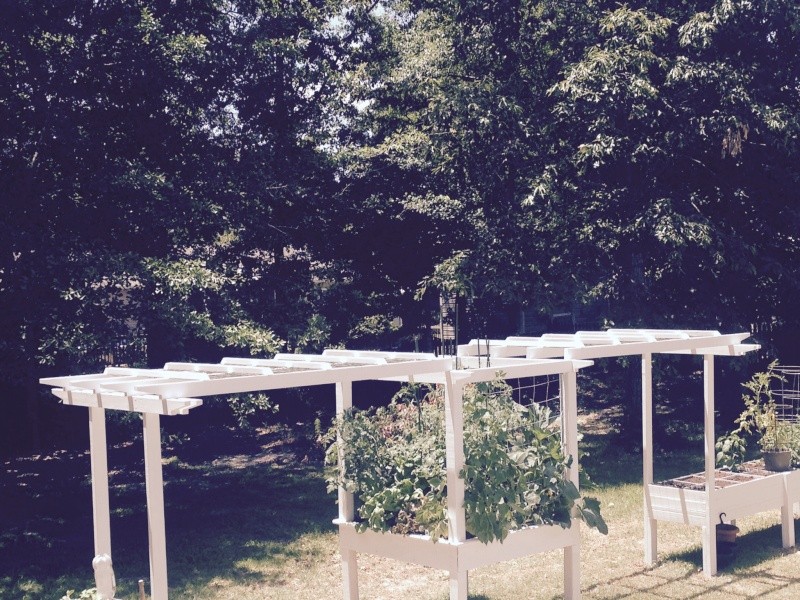
I still have to put something up to hang baskets on and I want to build some structure on top of the 4x4 and I still need to put my trim around the top of the beds themselves.
here is the the 2"x3" fencing that I put up top for the plant to grab onto:

Slats in place (I actually had this done last night but didn't like the spacing of the slats so I moved it 6" towards the 4x4):

From the back door:

Closer look at the slats:

I still have to put something up to hang baskets on and I want to build some structure on top of the 4x4 and I still need to put my trim around the top of the beds themselves.

ralitaco-
 Posts : 1303
Join date : 2010-04-04
Location : Southport , NC
 Re: Adventures in Table Top
Very nice looking set-up. I'd be tempted to run some strings down it for vining beans.

Marc Iverson-
 Posts : 3637
Join date : 2013-07-05
Age : 63
Location : SW Oregon
 Re: Adventures in Table Top
I am still working on what to do for a trellis on the 2' ends. Is that where you are suggesting the strings or do you mean from the pergola?Marc Iverson wrote:Very nice looking set-up. I'd be tempted to run some strings down it for vining beans.

ralitaco-
 Posts : 1303
Join date : 2010-04-04
Location : Southport , NC
 Re: Adventures in Table Top
Anywhere really. Your structure is sturdy with plenty of room. Beans plants aren't heavy like tomatoes, though their leaves can be big; still, they are not generally too hard to support. I supported mine with single or double lengths of ordinary garden twine last year, and had no breakage. The beans loved climbing all over it.
You have a nice set-up there from which you could string all sorts of things, from lighter things like vining beans to heavy things like large tomatoes or gourds or squash. Good spot fora trombocino squash maybe? Really your space looks good enough for anything.
Being so sturdy though, maybe taking advantage of that robust support would mean the lighter crops would be better somewhere else. Beans for instance can be supported on pretty darn skinny poles. It looks like you could hang a cow from what you've got.

Marc Iverson-
 Posts : 3637
Join date : 2013-07-05
Age : 63
Location : SW Oregon
Page 6 of 9 •  1, 2, 3, 4, 5, 6, 7, 8, 9
 Similar topics
» 2016 SFG Adventures in Hampstead, NC
» gardening Adventures
» 2021 SFG Adventures in Hampstead, NC
» Round 2 of my canning adventures
» 2017 SFG Adventures in Hampstead, NC
» gardening Adventures
» 2021 SFG Adventures in Hampstead, NC
» Round 2 of my canning adventures
» 2017 SFG Adventures in Hampstead, NC
Page 6 of 9
Permissions in this forum:
You cannot reply to topics in this forum


