Search
Latest topics
» N & C Midwest: Nov. Dec. 2024by OhioGardener Today at 11:10 am
» Happy Birthday!!
by Scorpio Rising Today at 7:21 am
» Butterbaby Hybrid Squash (Butternut)
by Scorpio Rising Yesterday at 8:19 pm
» Indoor Lighting for Kitchen Herbs & Lettuce
by OhioGardener 11/22/2024, 6:58 pm
» Catalog season has begun!
by OhioGardener 11/22/2024, 3:35 pm
» Interesting Marketing for Compost
by OhioGardener 11/21/2024, 7:29 pm
» How does green turn to brown?
by OhioGardener 11/21/2024, 4:58 pm
» Ohio Gardener's Greenhouse
by OhioGardener 11/21/2024, 12:16 pm
» Tree roots, yeeessss.....
by sanderson 11/20/2024, 2:21 am
» The SFG Journey-Biowash
by has55 11/19/2024, 7:37 pm
» What are you eating from your garden today?
by OhioGardener 11/19/2024, 8:27 am
» Cooked worms?
by KiwiSFGnewbie 11/19/2024, 1:04 am
» New SFG gardener in Auckland
by KiwiSFGnewbie 11/16/2024, 11:25 pm
» Kiwi's SFG Adventure
by KiwiSFGnewbie 11/12/2024, 7:10 pm
» Thanksgiving Cactus
by OhioGardener 11/12/2024, 5:40 pm
» Need Garden Layout Feedback
by markqz 11/9/2024, 9:16 pm
» Thai Basil
by Scorpio Rising 11/8/2024, 8:52 pm
» How best to keep a fallow SFG bed
by KiwiSFGnewbie 11/8/2024, 8:11 pm
» Preserving A Bumper Tomato Harvest with Freezing vs Canning
by plantoid 11/7/2024, 11:36 am
» Mark's first SFG
by sanderson 11/6/2024, 11:51 pm
» What Have You Picked From Your Garden Today
by OhioGardener 11/5/2024, 2:29 pm
» Greetings from Southeastern Wisconsin
by sanderson 11/5/2024, 2:01 pm
» Spinning Compost Bin-need some ideas
by rtfm 11/2/2024, 7:49 pm
» Growing fruit trees in Auckland
by OhioGardener 10/31/2024, 4:23 pm
» Vermiculite -- shipping sale through 10/31/2024
by markqz 10/30/2024, 2:27 pm
» N & C Midwest: October 2024
by Scorpio Rising 10/30/2024, 10:38 am
» Old Mulch and Closing Beds for Winter
by sanderson 10/26/2024, 11:00 pm
» Hello from Land of Umpqua, Oregon Zone 8b
by sanderson 10/25/2024, 3:14 pm
» Hello everyone!
by SFGHQSTAFF 10/24/2024, 3:22 pm
» Senior Gardeners
by sanderson 10/23/2024, 6:09 pm
Google
Please post pics of starter compost pile
+7
camprn
martha
walshevak
boffer
GlassHen
Old Hippie
buttaflie143
11 posters
Page 2 of 2
Page 2 of 2 •  1, 2
1, 2
 Re: Please post pics of starter compost pile
Will grass clippings cause a problem?

buttaflie143- Posts : 356
Join date : 2011-04-07
Location : Raleigh, NC - EST
 Re: Please post pics of starter compost pile
in the summer I use the green grass clippings to get my pile really heating up because they are full of nitrogen!!!  I try to be really careful with my grass clippings and loosely shake them when I add to the pile. Clumps of fresh grass clippings can become matted, anaerobic, foul smelling and slimy. This is not desirable.
 I try to be really careful with my grass clippings and loosely shake them when I add to the pile. Clumps of fresh grass clippings can become matted, anaerobic, foul smelling and slimy. This is not desirable.
  Re: Please post pics of starter compost pile
Take a deep breath and think about working backwards...
Mel says to use 5 different types of composts. That is your long term objective. How can you accomplish that with the least amount of impact on your lifestyle? I'm more than happy to tell you that I'm thrilled about the harvests I get using five composts. But I can only suggest ideas about how you can accomplish the same. You have to figure out how you can make it happen in a sustainable manner. Compost is what makes SFG work. It can be free or nearly free. There's no plastic packaging to dispose of, trips to the store, sales tax, transportation costs on the manufacturers side, etc. It's as green as you can get.
In this day and age, part of the problem is space. Some folks can barely find room for SFG boxes on their city lots, let alone compost piles. Also, heaven forbid, there should be a pile of 'stuff' sitting on the ground next to the house or fence line. Only you can decide if there is 'space'. It really doesn't take that much.
There are several ways to approach this compost thing. Try to mix everything at once in the right ratio, or have separate piles of finished composts to mix together, or a combination. Starting out, ideally, you would have a pile of each stuff sitting on the ground to compost. That would give you a chance to see that 10 cf of leaves will break down to less than 1 cf of compost. You would see that composting grass by itself is a stinky, gross, heavy process, that is not pleasant at all. You could have manures by the measured bucket full and find that they don't compost down nearly as much as plant material.
Or, you could remember that closies count. You could compost some stuff on the ground (like leaves), then stick it in your composter with equal parts of grass, and each type of manures. The best solution is figuring out what and how to best achieve your composting objectives, that fits within your daily comfort zone.
You can get two manures free; what a great start! Generally, manures compost down quickly. It's the bedding, wood chips or straw, that take a while to breakdown. Do you have room to have a small pile of each manure on the ground? Just for storage, and also, it makes it less daunting to get out and turn if you want to. You'll get worms magically appearing as well.
Finding your easy composts is like finding your vermiculite: it might be literally around the corner, once you find it. Personally, I consider my veggie scraps and coffee grounds to be bonus vitamins in my compost, since the volume is limited, I just throw them in as extras. I don't try to compost tree branches and other big stuff that take forever to break down.
I gotta run for now! Later.
 Re: Please post pics of starter compost pile
Thank you Boffer. You have given me lots to consider.

buttaflie143- Posts : 356
Join date : 2011-04-07
Location : Raleigh, NC - EST
 my compost
Today I added the chicken poo and my son was in the backyard with a couple of his friends. (The boys put a rabbit trap in the woods behind my house. Didn't catch a rabbit, but nabbed a squirrel. His little friend fancies himself a hunter. He's 9.  ). Anyways, my oldest comes to the patio door saying he's gotta go pee. I immediately directed him to my composter.
  Good old-fashioned urine. So here are a few pics of my compost. Its nice and moist throughout, but not dripping wet. What do you think? Does it look the part?


buttaflie143- Posts : 356
Join date : 2011-04-07
Location : Raleigh, NC - EST
 Re: Please post pics of starter compost pile
Great start! Be careful about telling your son to go pee in the composter when his friends are around. LOL! When word gets out around the neighbourhood they will all be there wanting to do it.
Gwynn
Gwynn

Old Hippie- Regional Hosts
-
 Posts : 1156
Join date : 2010-08-12
Age : 73
Location : Canada 3b
 Re: Please post pics of starter compost pile
Old Hippie wrote:Great start! Be careful about telling your son to go pee in the composter when his friends are around. LOL! When word gets out around the neighbourhood they will all be there wanting to do it.
Gwynn
 Thankfully the other boys were in the woods at the time fooling with the caged squirrel. But I told Camden not to share our secret with anyone, except Dad of course. When my twins go in the potty, I add theirs too.
buttaflie143- Posts : 356
Join date : 2011-04-07
Location : Raleigh, NC - EST
 Re: Please post pics of starter compost pile
My compost is 100 degrees F on day 4!!! 


buttaflie143- Posts : 356
Join date : 2011-04-07
Location : Raleigh, NC - EST

Old Hippie- Regional Hosts
-
 Posts : 1156
Join date : 2010-08-12
Age : 73
Location : Canada 3b
 Compost Percentages
You know what a great tip to remember about compost is?
Listen to Old Hippie!
It's really simple so don't get too wrapped up in the percentages, etc
Just do it! Your Garden will love ya for it.
Steve
www.growingyourgrub.com
Listen to Old Hippie!
It's really simple so don't get too wrapped up in the percentages, etc
Just do it! Your Garden will love ya for it.
Steve
www.growingyourgrub.com
 Re: Please post pics of starter compost pile
HOORAY!!!!!!buttaflie143 wrote:My compost is 100 degrees F on day 4!!!
 Re: Please post pics of starter compost pile
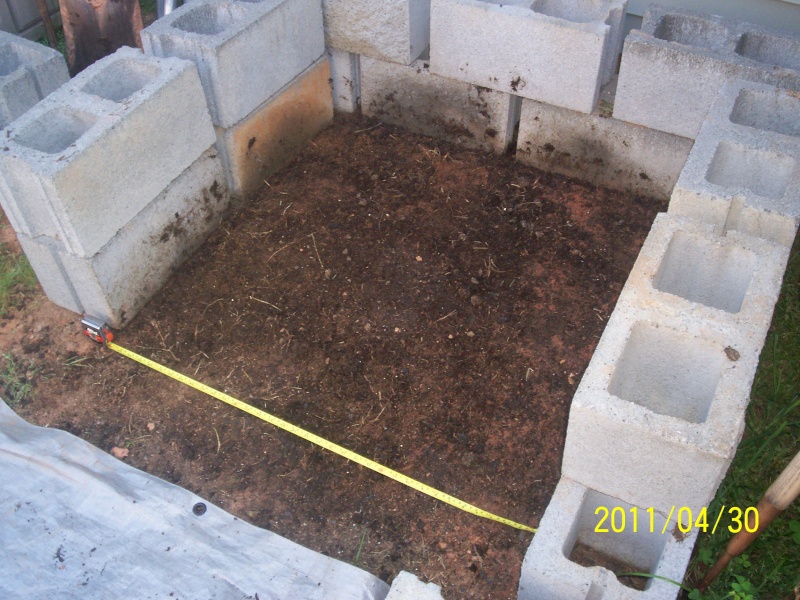
ok.....lil miss visual.  Not sure if this give you ratios but it is how I layer my greens and browns with some additional "activators".
Step 1 - Remove the working pile and put on a tarp. The tape measure is the visual for 3' x 3'

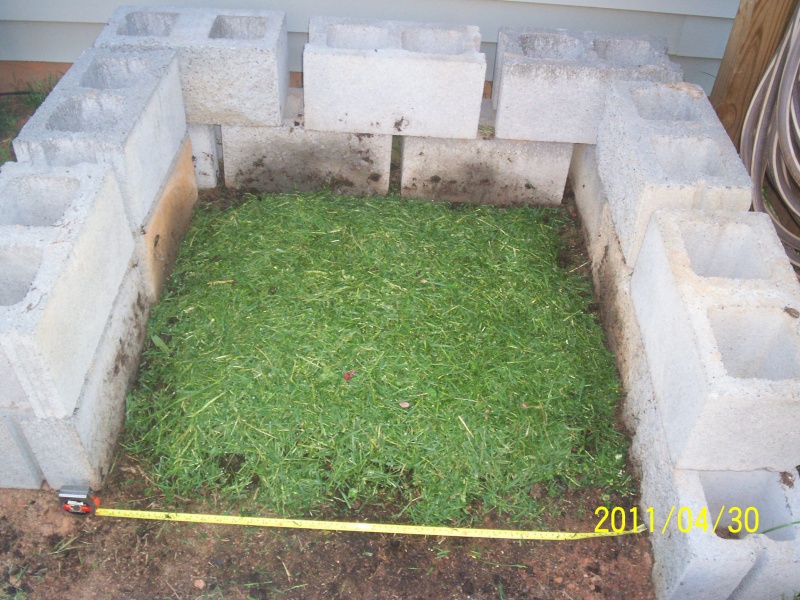
Step 2 - Mow (organically grown) Lawn and collect clippings. BTW - No chemicals / herbicides on lawn if you are using these.

Step 3 - Cut up and pile accumulated kitchen scraps

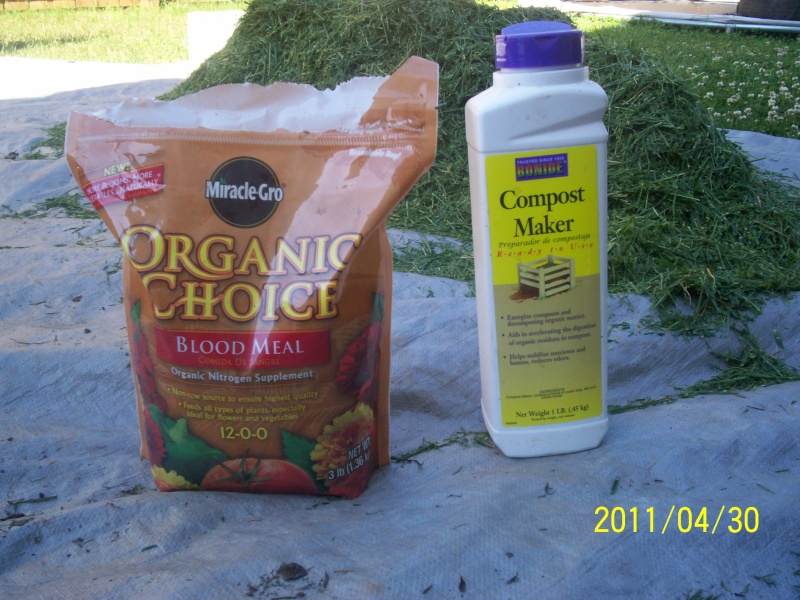
Step 4 - Get activators (optional) at the ready. These help heat the pile and act as a food source in addition to the clippings for those hungry bacteria / microbes.

Step 5 - Layer a few inches of existing unfinished compost, sprinkle activators, layer a few inches of grass, water.

Step 6 - Repeat this layering process but add the kitchen scraps to the middle of the pile as you go. This will be the hottest part of the pile.

I lightly water again and cover to keep it moist. Its mostly in the shade anyway. The blocks are spaced to allow air to circulate and a pole keeps the tarp "tented" to keep air flowing.

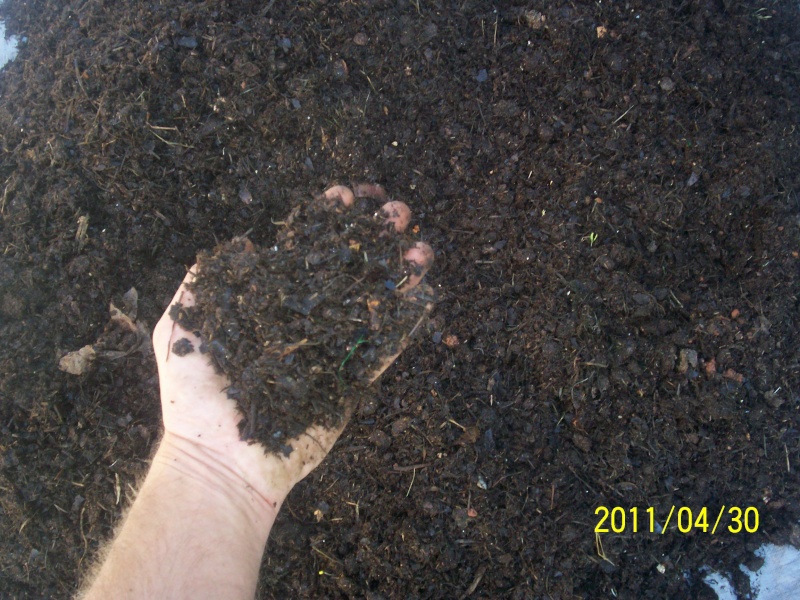
The pile is getting there. The stuff is getting an earthy dark, smells sweet and is becoming finer in texture. Taking my time with it though. I want this to be ready for a midsummer tomato boost and my fall plantings.

It gets soooooo gorgeously hot with all that additional nitrogen from the blood meal. I could not keep my hand in the middle for more than a couple of seconds today.
Step 1 - Remove the working pile and put on a tarp. The tape measure is the visual for 3' x 3'

Step 2 - Mow (organically grown) Lawn and collect clippings. BTW - No chemicals / herbicides on lawn if you are using these.

Step 3 - Cut up and pile accumulated kitchen scraps

Step 4 - Get activators (optional) at the ready. These help heat the pile and act as a food source in addition to the clippings for those hungry bacteria / microbes.

Step 5 - Layer a few inches of existing unfinished compost, sprinkle activators, layer a few inches of grass, water.

Step 6 - Repeat this layering process but add the kitchen scraps to the middle of the pile as you go. This will be the hottest part of the pile.

I lightly water again and cover to keep it moist. Its mostly in the shade anyway. The blocks are spaced to allow air to circulate and a pole keeps the tarp "tented" to keep air flowing.

The pile is getting there. The stuff is getting an earthy dark, smells sweet and is becoming finer in texture. Taking my time with it though. I want this to be ready for a midsummer tomato boost and my fall plantings.

It gets soooooo gorgeously hot with all that additional nitrogen from the blood meal. I could not keep my hand in the middle for more than a couple of seconds today.

staf74-
 Posts : 544
Join date : 2010-11-24
Age : 50
Location : York, SC
 Re: Please post pics of starter compost pile
staf74 wrote:ok.....lil miss visual.Not sure if this give you ratios but it is how I layer my greens and browns with some additional "activators".
Step 1 - Remove the working pile and put on a tarp. The tape measure is the visual for 3' x 3'
Step 2 - Mow (organically grown) Lawn and collect clippings. BTW - No chemicals / herbicides on lawn if you are using these.
Step 3 - Cut up and pile accumulated kitchen scraps
Step 4 - Get activators (optional) at the ready. These help heat the pile and act as a food source in addition to the clippings for those hungry bacteria / microbes.
Step 5 - Layer a few inches of existing unfinished compost, sprinkle activators, layer a few inches of grass, water.
Step 6 - Repeat this layering process but add the kitchen scraps to the middle of the pile as you go. This will be the hottest part of the pile.
I lightly water again and cover to keep it moist. Its mostly in the shade anyway. The blocks are spaced to allow air to circulate and a pole keeps the tarp "tented" to keep air flowing.
The pile is getting there. The stuff is getting an earthy dark, smells sweet and is becoming finer in texture. Taking my time with it though. I want this to be ready for a midsummer tomato boost and my fall plantings.
It gets soooooo gorgeously hot with all that additional nitrogen from the blood meal. I could not keep my hand in the middle for more than a couple of seconds today.


 ABSOLUTELY!!!! The pictures are fabulous and now I can try an open air compost pile!!!!
buttaflie143- Posts : 356
Join date : 2011-04-07
Location : Raleigh, NC - EST
 Re: Please post pics of starter compost pile
Staf74,
I have what appears to be fruit flies in my compost bin. What can I do to get rid of them, should I add more dry leaves?
I have what appears to be fruit flies in my compost bin. What can I do to get rid of them, should I add more dry leaves?

buttaflie143- Posts : 356
Join date : 2011-04-07
Location : Raleigh, NC - EST
 Re: Please post pics of starter compost pile
If you are sure they are fruit flies (as sometimes they are mistaken in the pile for fungus gnats) then you have a few things to try. Supposedly, coffee grounds dispels them. Pour them on top last. Some gardeners take one of those shop vacs and suck em up !!! That would be fun. Make an Apple cider vinegar trap for them. Place by your tumbler and they'll choose that, drown and die. Yes, try adding more browns, carbon, leaves etc. You might be too green.
or.......leave them. They are a nuisance but harmless really.
or.......leave them. They are a nuisance but harmless really.

staf74-
 Posts : 544
Join date : 2010-11-24
Age : 50
Location : York, SC
Page 2 of 2 •  1, 2
1, 2
 Similar topics
» How small can a starter compost pile be?
» Hmmm, Compost compost, how do you fair in the compost worldl?
» Compost starter, or something else
» Compost starter?
» Super Hot Compost Starter
» Hmmm, Compost compost, how do you fair in the compost worldl?
» Compost starter, or something else
» Compost starter?
» Super Hot Compost Starter
Page 2 of 2
Permissions in this forum:
You cannot reply to topics in this forum


