Search
Latest topics
» Mark's first SFGby markqz Yesterday at 8:26 pm
» Happy Thanksgiving from the USA
by OhioGardener Yesterday at 7:12 pm
» N & C Midwest: Nov. Dec. 2024
by OhioGardener 11/26/2024, 4:08 pm
» Catalog season has begun!
by cyclonegardener 11/26/2024, 9:12 am
» Happy Birthday!!
by Scorpio Rising 11/25/2024, 7:21 am
» Butterbaby Hybrid Squash (Butternut)
by Scorpio Rising 11/24/2024, 8:19 pm
» Indoor Lighting for Kitchen Herbs & Lettuce
by OhioGardener 11/22/2024, 6:58 pm
» Interesting Marketing for Compost
by OhioGardener 11/21/2024, 7:29 pm
» How does green turn to brown?
by OhioGardener 11/21/2024, 4:58 pm
» Ohio Gardener's Greenhouse
by OhioGardener 11/21/2024, 12:16 pm
» Tree roots, yeeessss.....
by sanderson 11/20/2024, 2:21 am
» The SFG Journey-Biowash
by has55 11/19/2024, 7:37 pm
» What are you eating from your garden today?
by OhioGardener 11/19/2024, 8:27 am
» Cooked worms?
by KiwiSFGnewbie 11/19/2024, 1:04 am
» New SFG gardener in Auckland
by KiwiSFGnewbie 11/16/2024, 11:25 pm
» Kiwi's SFG Adventure
by KiwiSFGnewbie 11/12/2024, 7:10 pm
» Thanksgiving Cactus
by OhioGardener 11/12/2024, 5:40 pm
» Need Garden Layout Feedback
by markqz 11/9/2024, 9:16 pm
» Thai Basil
by Scorpio Rising 11/8/2024, 8:52 pm
» How best to keep a fallow SFG bed
by KiwiSFGnewbie 11/8/2024, 8:11 pm
» Preserving A Bumper Tomato Harvest with Freezing vs Canning
by plantoid 11/7/2024, 11:36 am
» What Have You Picked From Your Garden Today
by OhioGardener 11/5/2024, 2:29 pm
» Greetings from Southeastern Wisconsin
by sanderson 11/5/2024, 2:01 pm
» Spinning Compost Bin-need some ideas
by rtfm 11/2/2024, 7:49 pm
» Growing fruit trees in Auckland
by OhioGardener 10/31/2024, 4:23 pm
» Vermiculite -- shipping sale through 10/31/2024
by markqz 10/30/2024, 2:27 pm
» N & C Midwest: October 2024
by Scorpio Rising 10/30/2024, 10:38 am
» Old Mulch and Closing Beds for Winter
by sanderson 10/26/2024, 11:00 pm
» Hello from Land of Umpqua, Oregon Zone 8b
by sanderson 10/25/2024, 3:14 pm
» Hello everyone!
by SFGHQSTAFF 10/24/2024, 3:22 pm
Google
WANTED: Pictures of Compost Bins
+21
sanderson
otherook
CapeCoddess
brianj555
Greenbeard
ColleenW
GrowRunner
Triciasgarden
llama momma
StrongAsMeat
reynajrainwater
camprn
yolos
jimmy cee
katjohn83
landarch
FeedMeSeeMore
audrey.jeanne.roberts
countrynaturals
has55
ralitaco
25 posters
Page 1 of 4
Page 1 of 4 • 1, 2, 3, 4 
 WANTED: Pictures of Compost Bins
So I am planning on building a compost bin but I am not sure what I should build. I have 8 or 10 36" 4x4's that I figure I can use as the side posts. After that I'm not sure. I have seen online tons of different ones, some have wood sides, others chicken wire.
I know I have seen some pictures in various threads but can't find them now. Could you share some photos of your bins and a brief description/explanation of what/why you built what you built? (I value your input more than the random ones from google.)
Thanks in advance.
I know I have seen some pictures in various threads but can't find them now. Could you share some photos of your bins and a brief description/explanation of what/why you built what you built? (I value your input more than the random ones from google.)
Thanks in advance.

ralitaco-
 Posts : 1303
Join date : 2010-04-04
Location : Southport , NC
 Re: WANTED: Pictures of Compost Bins
I know Yolos has a Cadillac. Here is my Camry: 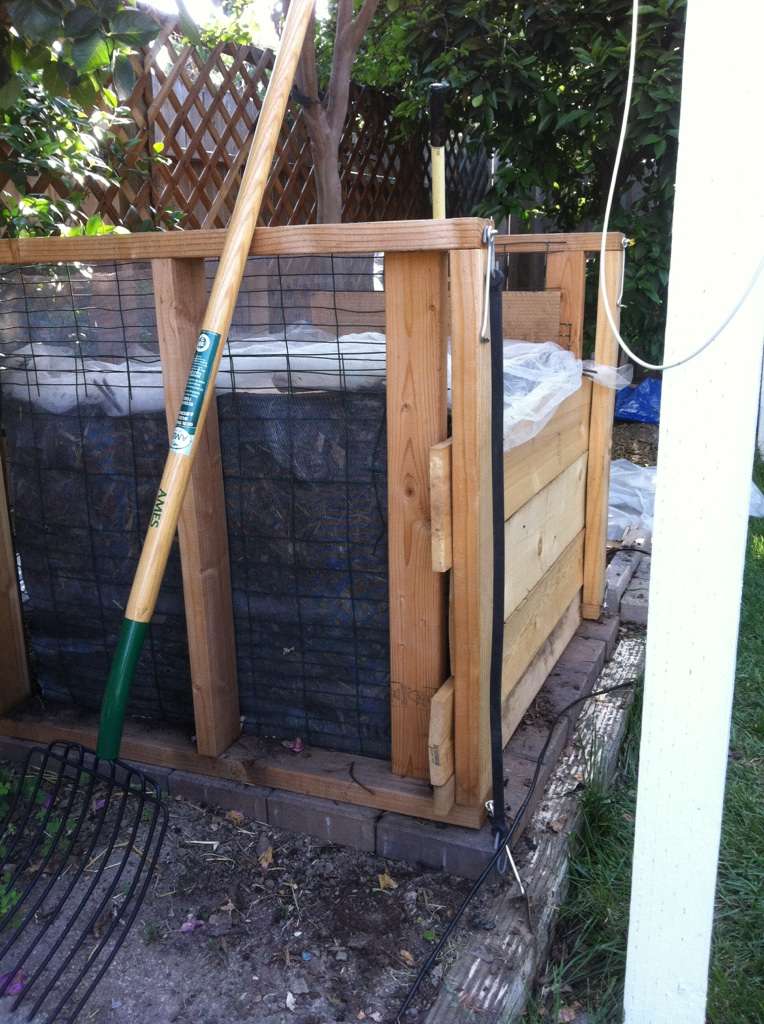
3' x 3' x 3', frame of 2" x 4". Removable front slats of various pine board scraps. Interior is now lined with 1/2" wire mesh with an inner liner of commercial grade weed fabric. I can't afford to loose any of the compost.

3' x 3' x 3', frame of 2" x 4". Removable front slats of various pine board scraps. Interior is now lined with 1/2" wire mesh with an inner liner of commercial grade weed fabric. I can't afford to loose any of the compost.
 Re: WANTED: Pictures of Compost Bins
Wow sanderson. That's beautiful.

has55- Posts : 2346
Join date : 2012-05-10
Location : Denton, tx
 Re: WANTED: Pictures of Compost Bins
I took my inspiration from Sanderson's set up. It is nowhere near the same build though. Mine is 3 x 3 x 3. Slats in the front can be removed. That tension wire and turnbuckle is used to hold the sides together when it is filled. There is also a 2 x 4 down below that holds the bottom of the sides in and can just be slipped out.
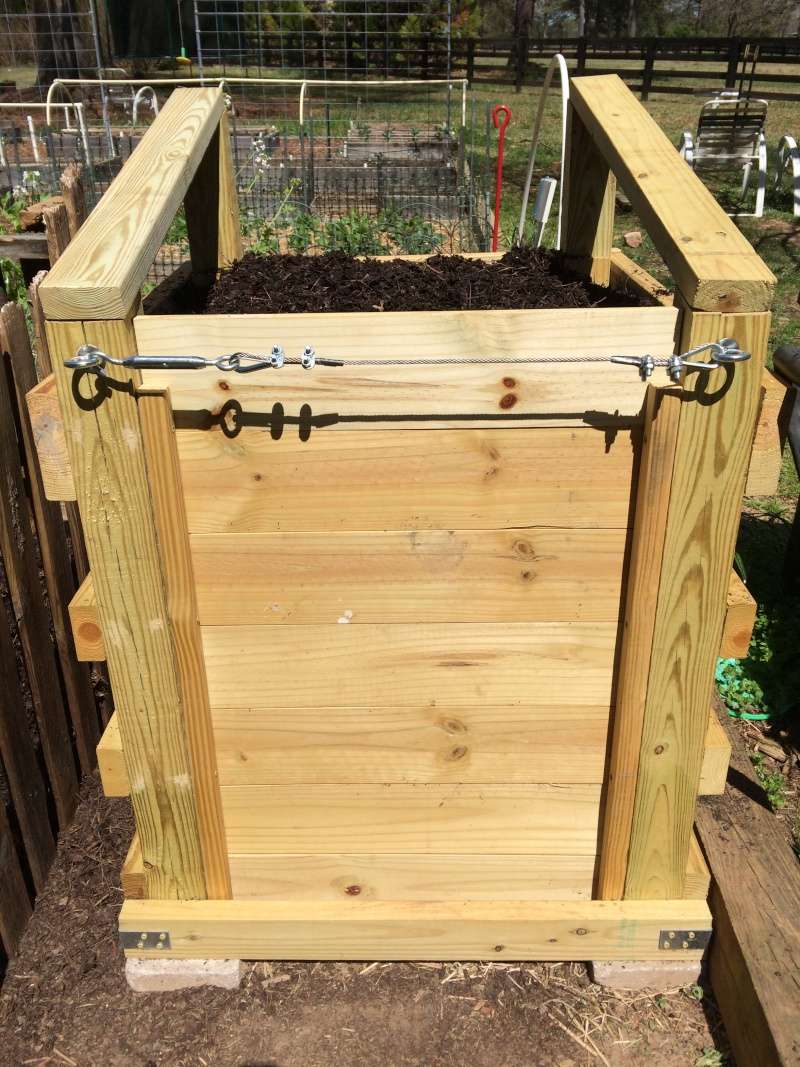
I still have not built a top for it.
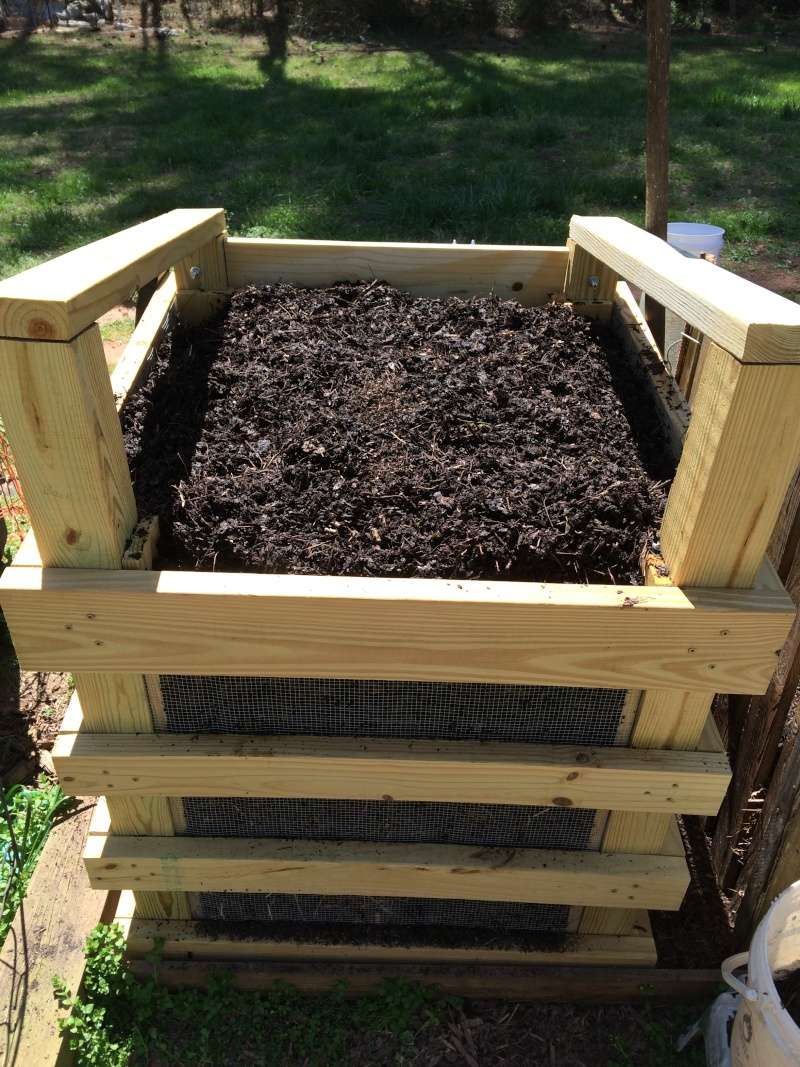
I put small bricks under each 4x4 to help keep them from rotting. The bottom is open to the ground. I used 1/4 inch hardware cloth for the sides and back.
I would suggest at least a two bin set up if you plan on turning your compost. You cannot see it in this picture, but I do have another old bin off to the side. It is almost rotted out and I will replace it this winter. I also have a holding bin for finished compost. Three bin would be better.

I still have not built a top for it.

I put small bricks under each 4x4 to help keep them from rotting. The bottom is open to the ground. I used 1/4 inch hardware cloth for the sides and back.
I would suggest at least a two bin set up if you plan on turning your compost. You cannot see it in this picture, but I do have another old bin off to the side. It is almost rotted out and I will replace it this winter. I also have a holding bin for finished compost. Three bin would be better.

yolos-
 Posts : 4139
Join date : 2011-11-20
Age : 74
Location : Brooks, Ga Zone 7B/8A
 Re: WANTED: Pictures of Compost Bins
After seeing those bins by sanderson and yolos, I would be totally embarrassed to post photos of my crude setup. One of mine is a black plastic bin and the other is a simple circle of plastic hardware cloth supported by a few flimsy rods pushed into the soil.

trolleydriver
Forum Moderator-
 Posts : 5388
Join date : 2015-05-04
Age : 77
Location : Ottawa, Ontario, Canada
 Re: WANTED: Pictures of Compost Bins
Same here. Mine is one of those portable dog fences against a real fence. When it's time to turn, I just unfasten one side, pull it around to the other side, and start over.trolleydriver wrote:After seeing those bins by sanderson and yolos, I would be totally embarrassed to post photos of my crude setup. One of mine is a black plastic bin and the other is a simple circle of plastic hardware cloth supported by a few flimsy rods pushed into the soil.
 Re: WANTED: Pictures of Compost Bins
when the pictures come in, it allows us to choose what method that may fit out style of composting, our personality, time and budget. Please put up, so we can see different techniques and pro and cons. so far everyone is using muscle power.

has55- Posts : 2346
Join date : 2012-05-10
Location : Denton, tx
 Re: WANTED: Pictures of Compost Bins
You asked for it ... here is my current setup. 
First the black plastic bin. I think we got this years ago when our City was handing them out for free.

Then, this strange looking bin that I threw together last Fall while I was collecting leaves. I was able to throw in some kitchen scraps before winter but it is mostly leaves.
I need to empty both bins and start them over again.
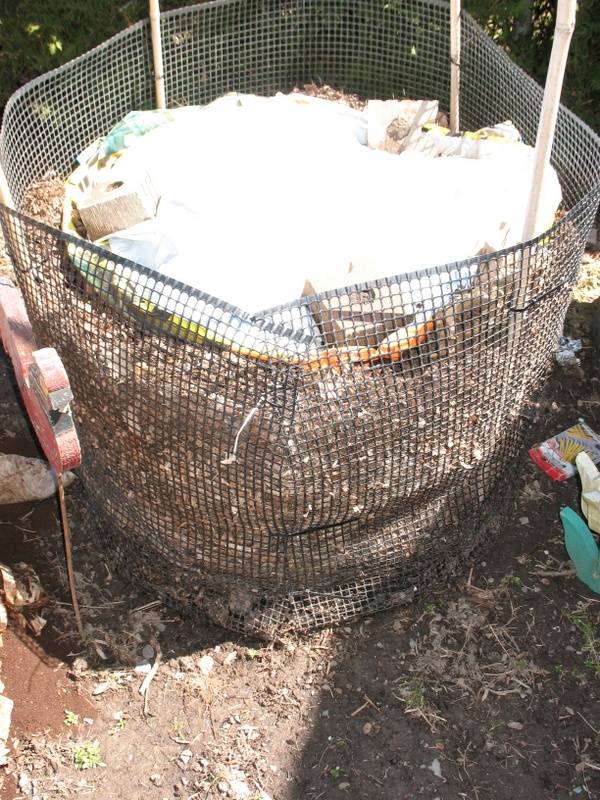
Then we have this bin which holds finished compost.
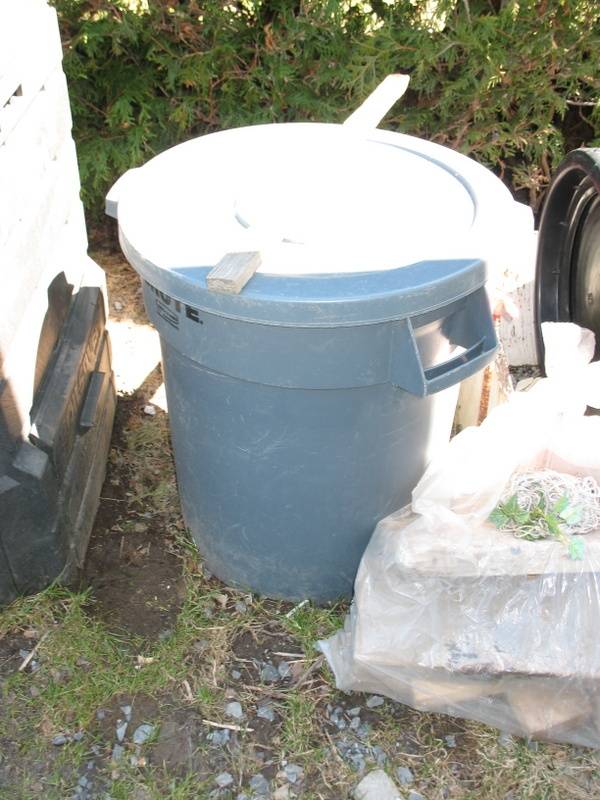
Finally, this is a pile of coffee grounds that I started about a week ago. It is just a storage area until I get around to using the grounds in the compost bins. I've got it partially covered with a leaf bag.

My aim is to move the composting operation closer to the SFG boxes. I may make new bins at that time. As well, this past week I bought the materials to make a simple compost sifter.
First the black plastic bin. I think we got this years ago when our City was handing them out for free.

Then, this strange looking bin that I threw together last Fall while I was collecting leaves. I was able to throw in some kitchen scraps before winter but it is mostly leaves.
I need to empty both bins and start them over again.

Then we have this bin which holds finished compost.

Finally, this is a pile of coffee grounds that I started about a week ago. It is just a storage area until I get around to using the grounds in the compost bins. I've got it partially covered with a leaf bag.

My aim is to move the composting operation closer to the SFG boxes. I may make new bins at that time. As well, this past week I bought the materials to make a simple compost sifter.

trolleydriver
Forum Moderator-
 Posts : 5388
Join date : 2015-05-04
Age : 77
Location : Ottawa, Ontario, Canada
 Re: WANTED: Pictures of Compost Bins
These are great...keep em coming.
Also, I would never, ever, ever thought of using the weed cloth on the sides...that is really slick!
If the round wire bin works, why go through the work of building a wooden one, besides, while I am looking for inspiration, I'm hoping the title of this thread and various pictures will be a resource for all of us that are new to composting and want to build bins.
So, here are some questions about your builds...
1. Sanderson, Yolos & anyone else that has a setup like theirs, why do you have INDIVIDUAL removable boards? Why not just build it so the entire side opens?
2. Sanderson, why is your bin sitting on bricks? I see that Yolos has her corner posts on bricks to keep the posts from rotting, but it looks like your entire bottom is brick.
3. Yolos,
a.) why is the back lower than the front? Or is it just the camera angle? In the second photo, it looks like the corner posts are higher in the back. I am guessing so you can put a slanted cover on it. But that 1st photo makes it look like the compost is sloping towards the back.
b.) Are the sides the same as the back with the hardware cloth?
c.) What's the purpose of the removable bottom 2x4?
d.) What goes in the 3 bins? 1. Materials that are being composted, 2. Empty bin for turning, 3. Finished compost?
4. TD etal,
a.) I have read conflicting articles about storing finished compost. Why do you put yours in the barrel vs just leaving it on the ground?
b.) For your round hardware cloth bin, I am guessing you just remove the bin, move it next to the pile and refill it to take care of turning...Is that correct?
5. What do you do with your browns and greens if you don't have enough to fill the bin completely (27 cu ft is a lot of material) or when the full bin is not done breaking down into finished compost?
Thanks for sharing your pictures and knowledge. I will post some pics later of my piles on the ground and my on hand supplies.
OMG...You are a hot messs...yours and Yolos' are both Caddie's...my pile on the ground is a junkyard reject.sanderson wrote:I know Yolos has a Cadillac. Here is my Camry
Also, I would never, ever, ever thought of using the weed cloth on the sides...that is really slick!
Could not have said it better.has55 wrote:when the pictures come in, it allows us to choose what method that may fit our style of composting, our personality, time and budget. Please put up, so we can see different techniques and pro and cons.
If the round wire bin works, why go through the work of building a wooden one, besides, while I am looking for inspiration, I'm hoping the title of this thread and various pictures will be a resource for all of us that are new to composting and want to build bins.
CN, Please post a picture or two. I would love to see it. Right now I just have a bunch of piles on the ground...I also have some 4x4's, some fencing, some 1/4" hardware cloth AND NO IDEA what I'm doing with compost.countrynaturals wrote:Mine is one of those portable dog fences against a real fence. When it's time to turn, I just unfasten one side, pull it around to the other side, and start over.
So, here are some questions about your builds...
1. Sanderson, Yolos & anyone else that has a setup like theirs, why do you have INDIVIDUAL removable boards? Why not just build it so the entire side opens?
2. Sanderson, why is your bin sitting on bricks? I see that Yolos has her corner posts on bricks to keep the posts from rotting, but it looks like your entire bottom is brick.
3. Yolos,
a.) why is the back lower than the front? Or is it just the camera angle? In the second photo, it looks like the corner posts are higher in the back. I am guessing so you can put a slanted cover on it. But that 1st photo makes it look like the compost is sloping towards the back.
b.) Are the sides the same as the back with the hardware cloth?
c.) What's the purpose of the removable bottom 2x4?
d.) What goes in the 3 bins? 1. Materials that are being composted, 2. Empty bin for turning, 3. Finished compost?
4. TD etal,
a.) I have read conflicting articles about storing finished compost. Why do you put yours in the barrel vs just leaving it on the ground?
b.) For your round hardware cloth bin, I am guessing you just remove the bin, move it next to the pile and refill it to take care of turning...Is that correct?
5. What do you do with your browns and greens if you don't have enough to fill the bin completely (27 cu ft is a lot of material) or when the full bin is not done breaking down into finished compost?
Thanks for sharing your pictures and knowledge. I will post some pics later of my piles on the ground and my on hand supplies.

ralitaco-
 Posts : 1303
Join date : 2010-04-04
Location : Southport , NC
 Re: WANTED: Pictures of Compost Bins
Well... we have a Cadillac and a Camry. My pile is a Beverley Hillbillies inspired, beat up truck, super duper hot-mess!!! But it gets the job done, lol! 


 Re: WANTED: Pictures of Compost Bins
ralitaco wrote:
4. TD etal,
a.) I have read conflicting articles about storing finished compost. Why do you put yours in the barrel vs just leaving it on the ground?
b.) For your round hardware cloth bin, I am guessing you just remove the bin, move it next to the pile and refill it to take care of turning...Is that correct?
a) No particular reason other than to keep it in one place.
b) It can be opened up at the front where the ends of the hardware cloth meet. Actually, this bin was set up as a temporary bin to hold things over the winter. Like you say it could be removed and moved to another location but I do not have space to do that.

trolleydriver
Forum Moderator-
 Posts : 5388
Join date : 2015-05-04
Age : 77
Location : Ottawa, Ontario, Canada
 Re: WANTED: Pictures of Compost Bins
We garden about 3/4 of an acre of our 5 acre property. I don't need compost storage because it pretty much gets used up as fast as I can make it with the extensive nature of my gardens. I do buy a large load of compost from the Gallo Winery near us every couple of years for the flower gardens, trees etc. That is in a huge pile that is covered with a tarp under one of our cottonwood trees. The tree was almost dead and it's lush and growing. It LOVES the compost pile, lol!
With a ready source of cow manure and soiled hay most of the year, we add our kitchen waste, gather coffee grounds from our church (about 2-3 gallons every other week or so) and chip anything we trim from our bushes, trees etc. Our neighbor has chicken and rabbit poo so we can have all we need whenever it's needed. The easiest way for me is to build huge piles during the fall when it's cool as we spend 4-5 months of the year at or over 100 degrees. They cool compost over the winter and are ready in the spring.
I only use my compost bin for Berkeley method hot composting pile using my kitchen waste compost so that my dogs are kept out of it - we almost lost one of our dogs to a refrigerator clean out. Dogs can't handle some types of mold and we dumped some moldy non-dairy sour cream in the garden and washed it into the soil thinking it would not be a problem. We didn't realize that she dug down into the bed and ate the dirt with the mold on it and went into convulsions within minutes. So make sure your compost bin is secure against your animals being able to get into it!
 our dirt makers
Our first year bin now used for storing bags of grass, leaves, extra soil or whatever....
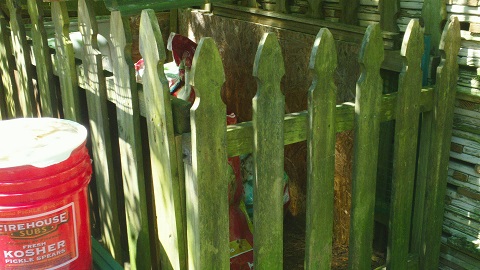
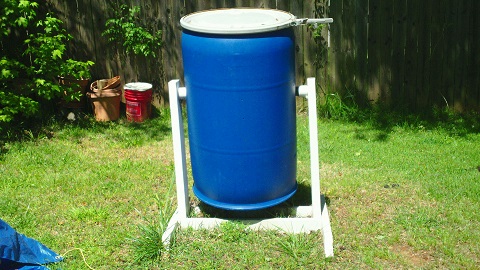
Our upgrade for the 2nd and this year SFG. Makes good compost. Just dump stuff in and turn it every so often.
It was a ready made contraption and we probably paid too much for it vs making it a DIY project, ($75) but we had too many other SFG upgrades going on so it was worth it to us.

Our upgrade for the 2nd and this year SFG. Makes good compost. Just dump stuff in and turn it every so often.
It was a ready made contraption and we probably paid too much for it vs making it a DIY project, ($75) but we had too many other SFG upgrades going on so it was worth it to us.


FeedMeSeeMore-
 Posts : 143
Join date : 2014-05-06
Location : Georgia
 Re: WANTED: Pictures of Compost Bins
1. It was originally built with a removable front with hooks and bungee cords to keep the sides from spreading. When I went to build a pile, I realized I would have to lift each fork load or bucket of material up over 3' high.  So much more control and ease with a front that can be built up and taken down in increments.
2. Two reasons the whole thing is on bricks, actually three. One, to minimize rotting of the lower plates. Two, so I wouldn't loose any material on the ground or get dirt in the compost. Three, so tree roots wouldn't invade so bad. Oh, a 4th would be that there is a barrier between the HOT compost and the ground. There are a rose and a tree on either side.
3. A sloped roof allows rain to run off. I cover mine with a tarp but I have to support it with poles underneath to create a slope. Otherwise, the rain collects and the tarp collapses onto the compost. I cover to keep leaves and seeds and woolly caterpillars from falling into the mix.
. . .
5. For me, building a pile is an event. Leaves are stored in covered wire bins until it's time. Husband makes a manure run, maybe also buying another bale of alfalfa hay, collecting Starbucks for a few days. Going to the Farmers Market Friday night, maybe Sat morning with all my buckets. Chopping, mowing, shredding, fruit pitting, dancing on the Starbucks to break up the pucks, etc. I have to plan for it and get all the materials collected and ready. If I had more space, I could store more than just the leaves in their wire cages. I wish I had a freezer for storing chopped produce beyond what I put in the worm tubes and one on-ground box. Everyone has a different lot size. Browns are easy to store. It's the "greens" that I have a problem.
 So much more control and ease with a front that can be built up and taken down in increments.
2. Two reasons the whole thing is on bricks, actually three. One, to minimize rotting of the lower plates. Two, so I wouldn't loose any material on the ground or get dirt in the compost. Three, so tree roots wouldn't invade so bad. Oh, a 4th would be that there is a barrier between the HOT compost and the ground. There are a rose and a tree on either side.
3. A sloped roof allows rain to run off. I cover mine with a tarp but I have to support it with poles underneath to create a slope. Otherwise, the rain collects and the tarp collapses onto the compost. I cover to keep leaves and seeds and woolly caterpillars from falling into the mix.
. . .
5. For me, building a pile is an event. Leaves are stored in covered wire bins until it's time. Husband makes a manure run, maybe also buying another bale of alfalfa hay, collecting Starbucks for a few days. Going to the Farmers Market Friday night, maybe Sat morning with all my buckets. Chopping, mowing, shredding, fruit pitting, dancing on the Starbucks to break up the pucks, etc. I have to plan for it and get all the materials collected and ready. If I had more space, I could store more than just the leaves in their wire cages. I wish I had a freezer for storing chopped produce beyond what I put in the worm tubes and one on-ground box. Everyone has a different lot size. Browns are easy to store. It's the "greens" that I have a problem.
 Re: WANTED: Pictures of Compost Bins
Thanks AJR for sharing yours. I was going to try the recycled pallets but they would not fit in my van door.
Thanks TD. I put my sifted compost in a trash can too, but thought I might have messed up. Granted, I have used most of it refreshing my boxes and my mother's boxes.
FMSM, Thanks for your photos. I like the simplicity of the picket fence. If I was setting up in the other corner of the yard, I may have gone with that b/c that is the fence my neighbor on that side has. However where I am putting the composter, there is a 6' shadow box privacy fence. Also, I really like your barrel, in particular the lid that comes off in its entirety. Most of the ones I have seen have small openings and reports on them are that they are hard to empty.
Lastly, when you open that barrel and see all the finished compost do you say "Sure looks like plant food to me"

ralitaco-
 Posts : 1303
Join date : 2010-04-04
Location : Southport , NC
 Re: WANTED: Pictures of Compost Bins
So you just store the compost on the ground with a tarp over it.audrey.jeanne.roberts wrote:...I do buy a large load of compost from the Gallo Winery near us every couple of years for the flower gardens, trees etc. That is in a huge pile that is covered with a tarp under one of our cottonwood trees. The tree was almost dead and it's lush and growing. It LOVES the compost pile, lol!
Just so I'm sure I'm understanding correctly...you add various ingredients over several months and just leave them be for them to break down over winter with no intervention on your part. correct?audrey.jeanne.roberts wrote:With a ready source of cow manure and soiled hay most of the year, we add our kitchen waste, gather coffee grounds from our church (about 2-3 gallons every other week or so) and chip anything we trim from our bushes, trees etc. Our neighbor has chicken and rabbit poo so we can have all we need whenever it's needed. The easiest way for me is to build huge piles during the fall when it's cool as we spend 4-5 months of the year at or over 100 degrees. They cool compost over the winter and are ready in the spring.

ralitaco-
 Posts : 1303
Join date : 2010-04-04
Location : Southport , NC
 Re: WANTED: Pictures of Compost Bins
That makes sense, especially if you are turning it every couple of days.sanderson wrote:1. It was originally built with a removable front with hooks and bungee cords to keep the sides from spreading. When I went to build a pile, I realized I would have to lift each fork load or bucket of material up over 3' high.So much more control and ease with a front that can be built up and taken down in increments.
That makes sense too. Just curious, do worms find their way in still?sanderson wrote:2. Two reasons the whole thing is on bricks, actually three. One, to minimize rotting of the lower plates. Two, so I wouldn't loose any material on the ground or get dirt in the compost. Three, so tree roots wouldn't invade so bad. Oh, a 4th would be that there is a barrier between the HOT compost and the ground. There are a rose and a tree on either side.
All that makes sense too.sanderson wrote:3. A sloped roof allows rain to run off. I cover mine with a tarp but I have to support it with poles underneath to create a slope. Otherwise, the rain collects and the tarp collapses onto the compost. I cover to keep leaves and seeds and woolly caterpillars from falling into the mix.
So if I am understanding this correctly, you build your entire 27 cu ft pile of browns and greens at one time, is that right?sanderson wrote:5. For me, building a pile is an event. Leaves are stored in covered wire bins until it's time. Husband makes a manure run, maybe also buying another bale of alfalfa hay, collecting Starbucks for a few days. Going to the Farmers Market Friday night, maybe Sat morning with all my buckets. Chopping, mowing, shredding, fruit pitting, dancing on the Starbucks to break up the pucks, etc. I have to plan for it and get all the materials collected and ready. If I had more space, I could store more than just the leaves in their wire cages. I wish I had a freezer for storing chopped produce beyond what I put in the worm tubes and one on-ground box. Everyone has a different lot size. Browns are easy to store. It's the "greens" that I have a problem.
You said
can you post a picture of that too? I have lots and lots of leaves that I just raked into a pile.Leaves are stored in covered wire bins until it's time.

ralitaco-
 Posts : 1303
Join date : 2010-04-04
Location : Southport , NC
 Re: WANTED: Pictures of Compost Bins
Here is my pile of rusty car parts...
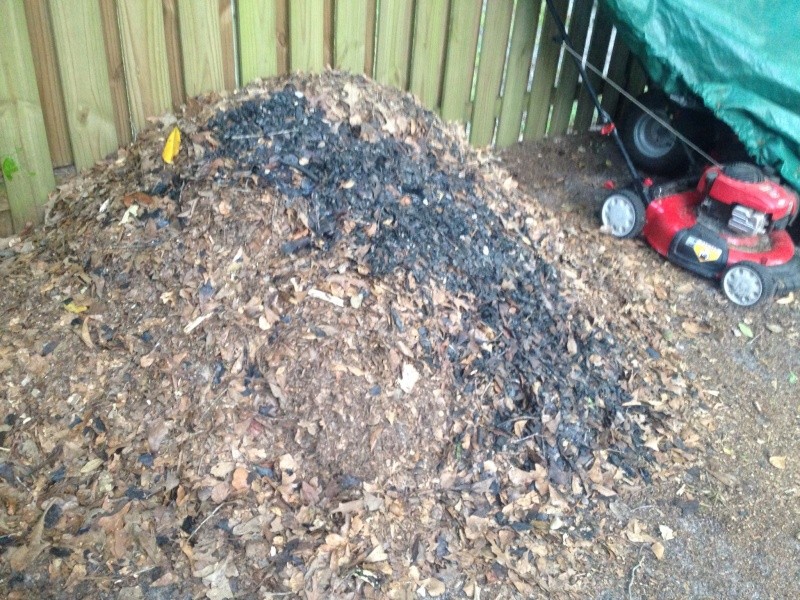
Big Pile of leaves mulched by the riding lawn mower (the black ones were from a partially burned pile)
More Leaves piled at the base of a tree w/ a neighbor's dog coming for a visit

My pile of leaves and veggie scraps...
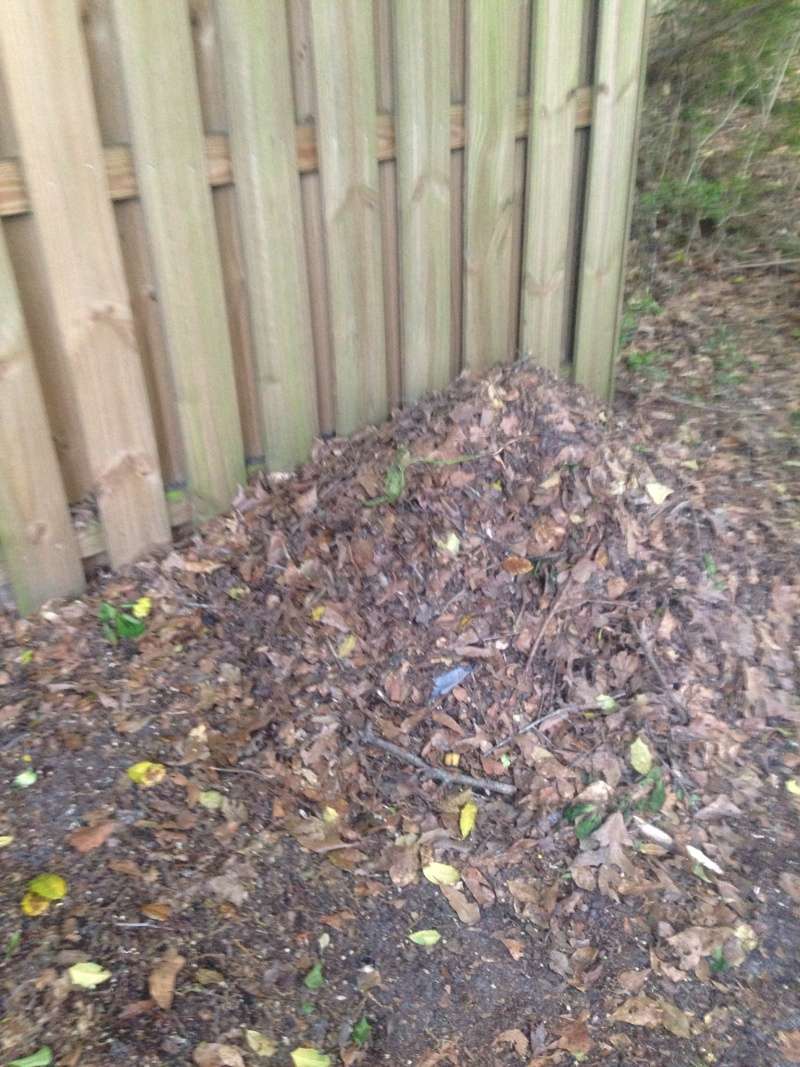
Yes another pile of leaves behind the left over 4' wire fencing with 2"x4" openings

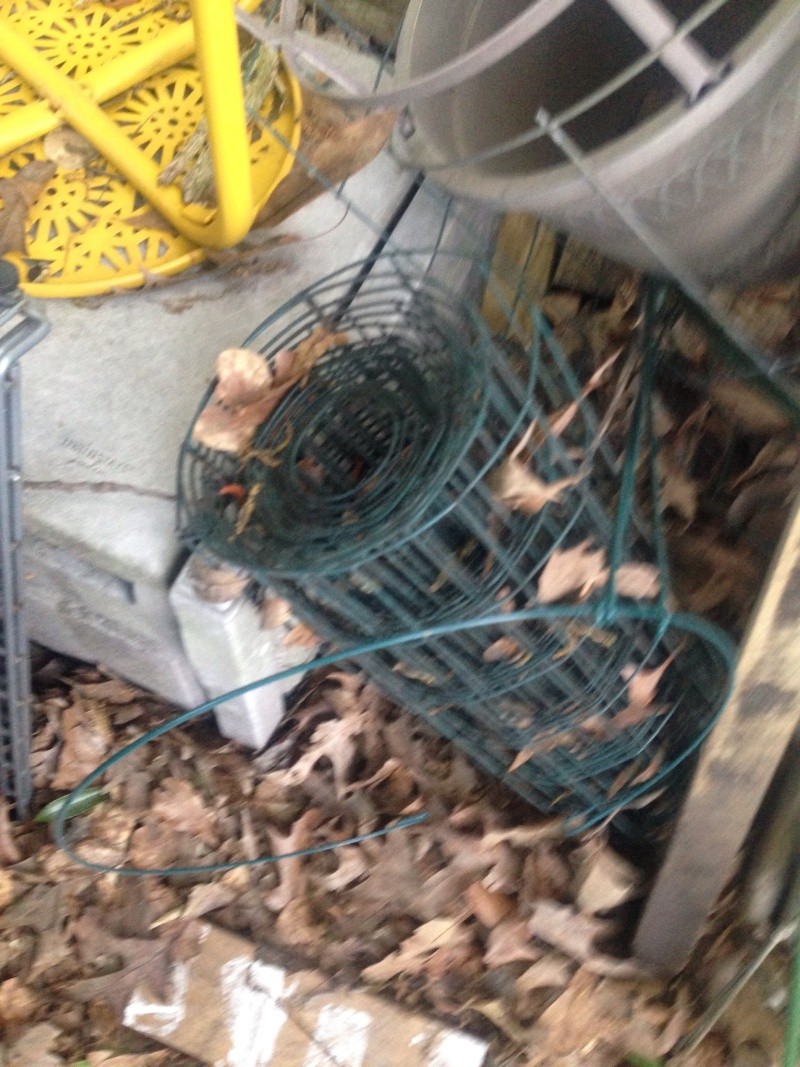
A roll of coated wire fencing 2' wide (I believe) w/ 2"x4" openings
Some 1/4" hardware cloth
Loose
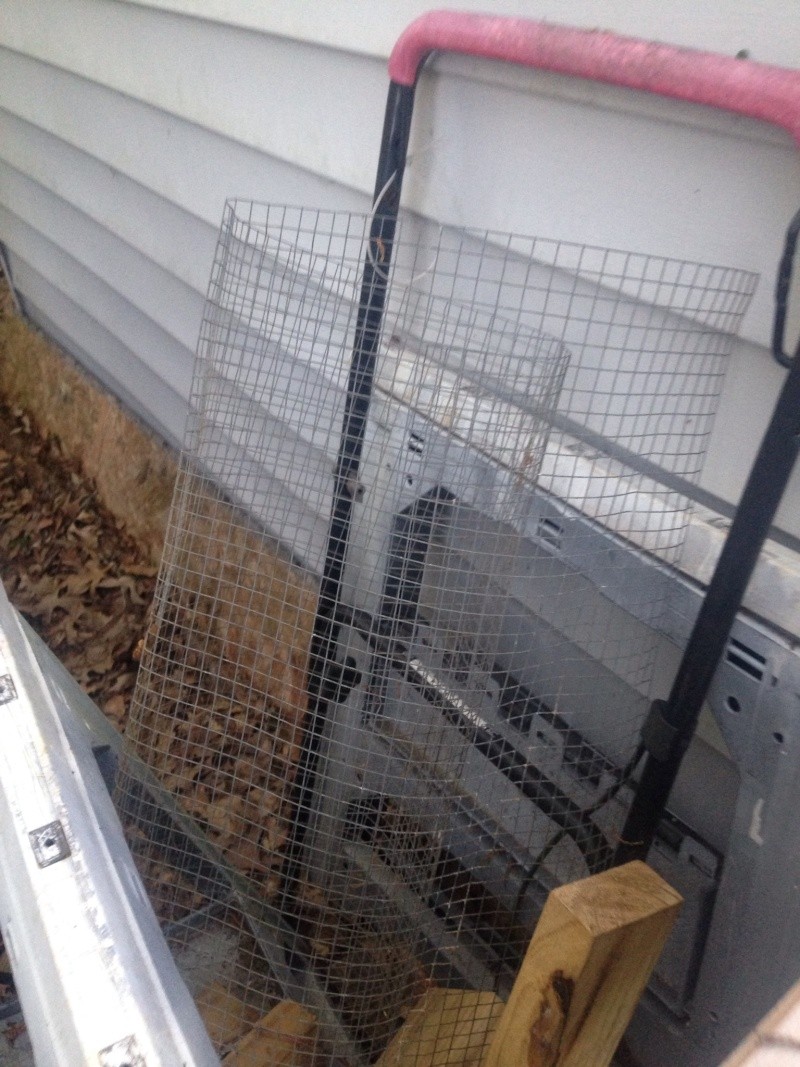
On a frame
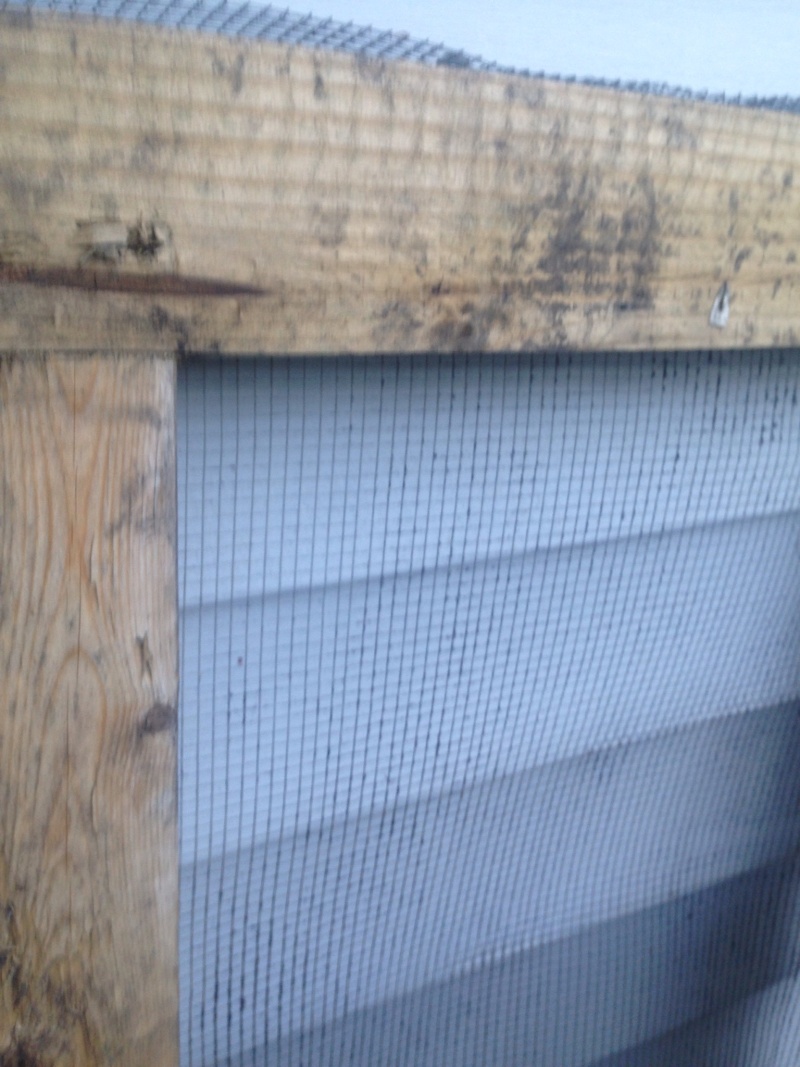
Lastly 8 - 3' 4x4's
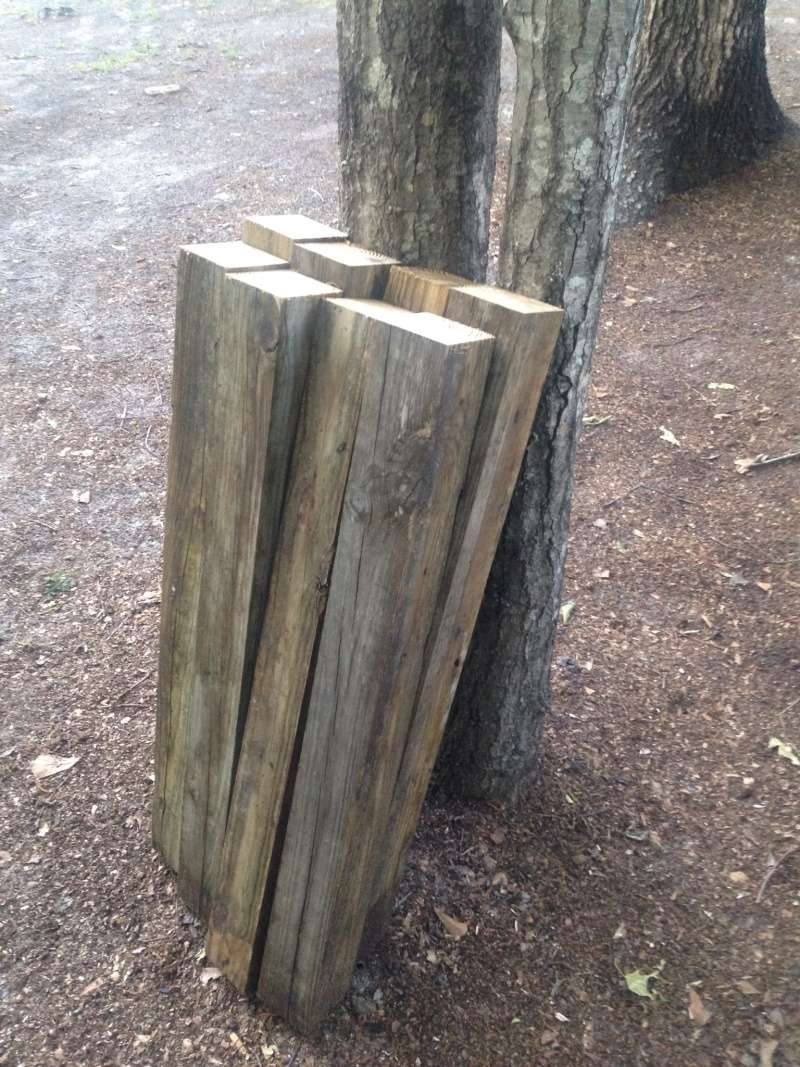
Oh and somewhere in the shed is a roll of window screen and a roll of good weed cloth
I'm thinking for the short term, I'll turn that 4' fencing into a bin like TD's.
Then I'll start working on making a bin like Sanderson and Yolos
Big Pile of leaves mulched by the riding lawn mower (the black ones were from a partially burned pile)

More Leaves piled at the base of a tree w/ a neighbor's dog coming for a visit

My pile of leaves and veggie scraps...

Yes another pile of leaves behind the left over 4' wire fencing with 2"x4" openings

A roll of coated wire fencing 2' wide (I believe) w/ 2"x4" openings

Some 1/4" hardware cloth
Loose

On a frame

Lastly 8 - 3' 4x4's

Oh and somewhere in the shed is a roll of window screen and a roll of good weed cloth
I'm thinking for the short term, I'll turn that 4' fencing into a bin like TD's.
Then I'll start working on making a bin like Sanderson and Yolos

ralitaco-
 Posts : 1303
Join date : 2010-04-04
Location : Southport , NC
 Re: WANTED: Pictures of Compost Bins
Here are a few pics of my compost piles, I have a great deal of natural composting material and no power equipment to turn it so I basically put it all together as I get it, add water and chicken manure when I can. I try to cover them when they are new after all the right ingredients are added, then after they cook down I try to put them together. I use concrete reinforcement wire, which comes in very handy for all the leaves in the fall. I have made piles eight feet tall that have cooked down to three feet in about six months.
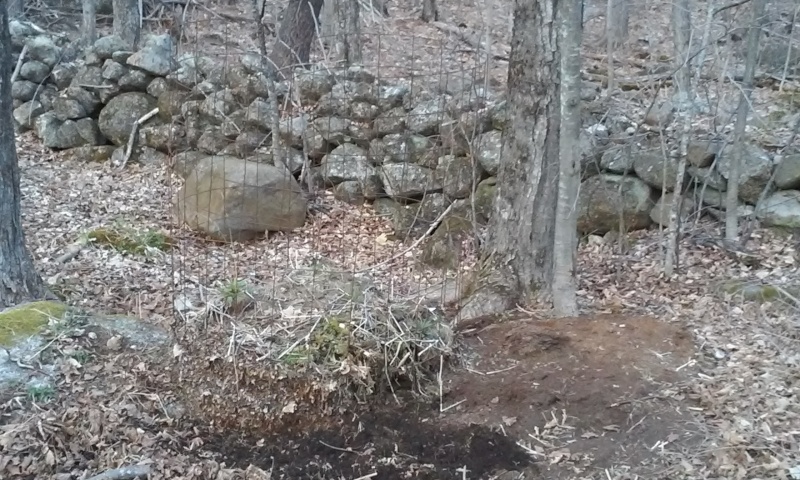
The pic above has the concrete wire, about six feet tall, and is one and a half years old, it started out over eight feet tall. There is another older partial pile next to it, I will be using these soon.

I found some cyclone fencing and some metal posts, so it is now a compost bin.
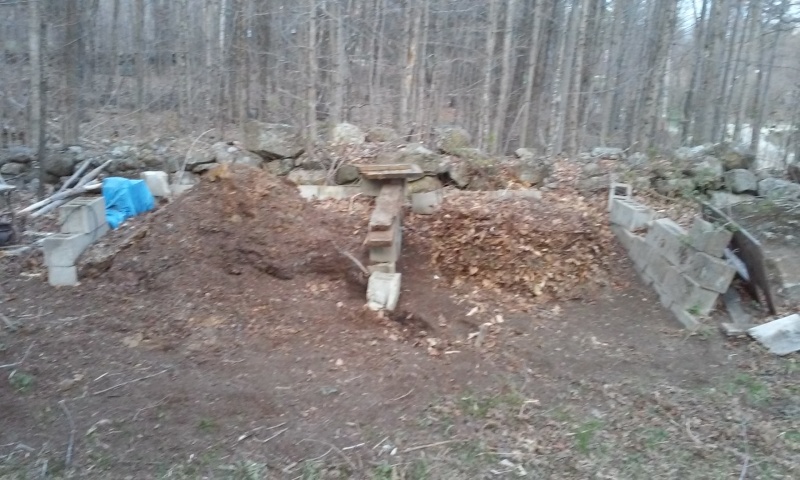
These cinder block compost bins were here when we moved in, you can see I made a round wire cage on the right to keep the leaves in the bin. I have mixed wood ash and chicken manure in it already, now waiting for rain to add water. The bin on the left is from last fall, I will add some chicken manure tea to it and cover it with a tarp, it will be ready for use by mid to late summer.

We use the black bin for kitchen scraps, it keeps the critters out so it can be closer to the house. When we have six feet of snow on the ground I don't like to make a long trek to make compost. The blue bin is on its way to the recycle center, I just don't seem to be able to make it work for me. It has issues, it is falling apart and I am unable to mend it.
This summer I will get a fair amount of grass clippings that I can add to my newest leafy pile which will cook down faster.
Rock

The pic above has the concrete wire, about six feet tall, and is one and a half years old, it started out over eight feet tall. There is another older partial pile next to it, I will be using these soon.

I found some cyclone fencing and some metal posts, so it is now a compost bin.

These cinder block compost bins were here when we moved in, you can see I made a round wire cage on the right to keep the leaves in the bin. I have mixed wood ash and chicken manure in it already, now waiting for rain to add water. The bin on the left is from last fall, I will add some chicken manure tea to it and cover it with a tarp, it will be ready for use by mid to late summer.

We use the black bin for kitchen scraps, it keeps the critters out so it can be closer to the house. When we have six feet of snow on the ground I don't like to make a long trek to make compost. The blue bin is on its way to the recycle center, I just don't seem to be able to make it work for me. It has issues, it is falling apart and I am unable to mend it.
This summer I will get a fair amount of grass clippings that I can add to my newest leafy pile which will cook down faster.
Rock

bigdogrock-
 Posts : 437
Join date : 2016-04-17
Location : NH
 Re: WANTED: Pictures of Compost Bins
bigdogrock wrote:
... The blue bin is on its way to the recycle center, I just don't seem to be able to make it work for me. It has issues, it is falling apart and I am unable to mend it.
I had one of those blue bins. I originally got it from an elderly neighbour. It never did give me any compost and it was extremely hard to rotate when it had sufficient material in it. I eventually put it out at the end of my driveway to get rid of it and thankfully someone took it away.

trolleydriver
Forum Moderator-
 Posts : 5388
Join date : 2015-05-04
Age : 77
Location : Ottawa, Ontario, Canada
 Re: WANTED: Pictures of Compost Bins
Yes, compost on the ground with a tarp and some large wood pieces to anchor it at the edges. The pile was about 6 cu yd when first brought home. It's almost gone now.ralitaco wrote:So you just store the compost on the ground with a tarp over it.audrey.jeanne.roberts wrote:...I do buy a large load of compost from the Gallo Winery near us every couple of years for the flower gardens, trees etc. That is in a huge pile that is covered with a tarp under one of our cottonwood trees. The tree was almost dead and it's lush and growing. It LOVES the compost pile, lol!Just so I'm sure I'm understanding correctly...you add various ingredients over several months and just leave them be for them to break down over winter with no intervention on your part. correct?audrey.jeanne.roberts wrote:With a ready source of cow manure and soiled hay most of the year, we add our kitchen waste, gather coffee grounds from our church (about 2-3 gallons every other week or so) and chip anything we trim from our bushes, trees etc. Our neighbor has chicken and rabbit poo so we can have all we need whenever it's needed. The easiest way for me is to build huge piles during the fall when it's cool as we spend 4-5 months of the year at or over 100 degrees. They cool compost over the winter and are ready in the spring.
The winter pile is usually a long one 10-12 feet long 3-4 wide and high. I just pile up cow manure, hay and left over garden waste like tomato plants, leaves, coffee grounds etc. Once it's made I don't even look at it until the spring and it will be totally ready to go.
I intentionally have hot compost piles (mostly bacterial break down) and cold (mostly fungal and worm break down. The reason is that you end up with a different chemical and functional composition based on how it is broken down and fungal activity is very important for plants. Just another way of getting variety in the nutrients that will go into my food :-)
 Re: WANTED: Pictures of Compost Bins
Here's an older photo of 2 of the leaf bins. I'll see if I can take a newer photo tomorrow with the third rectangular one. I keep heavy plastic over the 3 bins for rain protection. 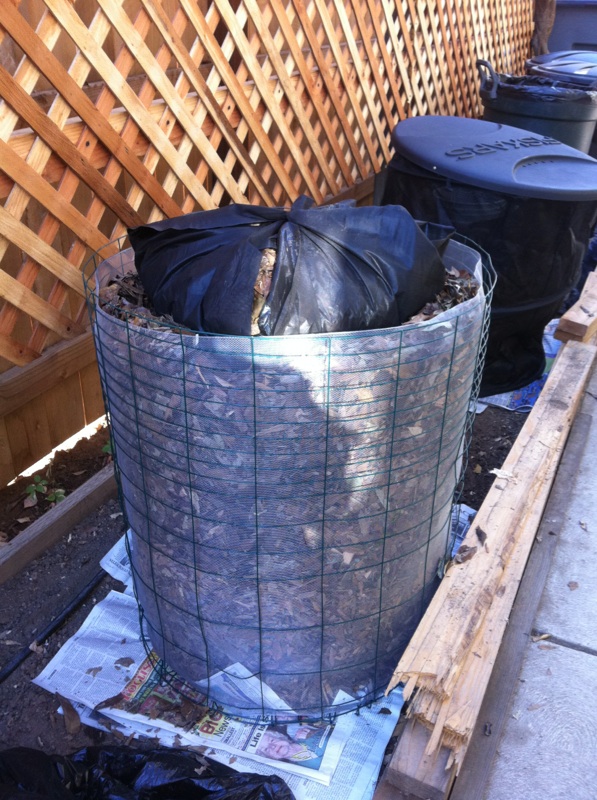
I would caution against piling leaves up against a wood fence or around the base and truck of a tree. The fence can get dry rot (Trolleydriver has a photo where his neighbor piled leaves against the common fence) and the tree needs a clear base around the trunk.

I would caution against piling leaves up against a wood fence or around the base and truck of a tree. The fence can get dry rot (Trolleydriver has a photo where his neighbor piled leaves against the common fence) and the tree needs a clear base around the trunk.
 Re: WANTED: Pictures of Compost Bins
sanderson wrote:...
I would caution against piling leaves up against a wood fence or around the base and truck of a tree. The fence can get dry rot (Trolleydriver has a photo where his neighbor piled leaves against the common fence) and the tree needs a clear base around the trunk.
sanderson ... that was asomeone else who posted the photo of leaves against a fence in the neighbour's yard. I suggested building a door at the bottom of the fence to get at them.

trolleydriver
Forum Moderator-
 Posts : 5388
Join date : 2015-05-04
Age : 77
Location : Ottawa, Ontario, Canada
 Re: WANTED: Pictures of Compost Bins
Opps, failing memory . .  Folks, not TD.
Talitaco, yes, worms find their way up to the compost once it is cool.
Talitaco, yes, worms find their way up to the compost once it is cool.
 Re: WANTED: Pictures of Compost Bins
sanderson wrote:Opps, failing memory . .Folks, not TD.
Talitaco, yes, worms find their way up to the compost once it is cool.
Talitaco

You are on the struggle bus tonight Sanderson

ralitaco-
 Posts : 1303
Join date : 2010-04-04
Location : Southport , NC
Page 1 of 4 • 1, 2, 3, 4 
 Similar topics
» New compost bins X3
» The Toy Box
» Cover compost bins ???
» Camel Poo in compost bins?
» beginning new compost bins
» The Toy Box
» Cover compost bins ???
» Camel Poo in compost bins?
» beginning new compost bins
Page 1 of 4
Permissions in this forum:
You cannot reply to topics in this forum


